Tuesday, February 26, 2019

kitchen post 32 - kitchen window and cutting apart the countertop

yesterday dad came up and we ran to menards and worked more on the kitchen.

my new sink
301

my new faucet
302

dad has suggested possibly replacing the kitchen window that only goes into the porch. its an original window, I didnt have it replaced with all the other windows, but I think I should have and I regret that now.

my choices are either paint it white to match, which would be a pain in the ass as it does not come apart to paint. I'd have to paint it in place, moving the double hung sections up and down as I went.

or replace it. but the porch side of the window has ship-lap (diagonal pine boards) on that wall. not exterior siding. it looks like a new window might cost in the neighborhood of $100-180 bucks. its a smallish window, about 30x40.

I'd like to replace it rather than fuss with painting. I think I have some internet investigating to do, watch some youtube videos and see what all would be involved.

we looked for replacement trim for the window. I want not-wood trim, being over the kitchen sink. they make polystyrene white trim like what is around the bathroom window in the tub/shower. menards didnt have the plain simple smooth trim like what is currently all over my house. its special order only. so later I looked online and it looks like both home depot and lowes carry that particular trim in stock. I'll have to swing by there and get some. I dont want wood trim directly above the kitchen sink. i might also replace the trim in the bathroom with the smooth matching trim. the window people put a fancier grooved/decorative trim in the shower that catches water and limescale in those grooves.

we came home and dad used his skill saw to cut the backsplash part of the countertop off to a more standard level rather than going all the way up the wall like it did. and we removed those two sections of the backsplash/countertop. my old countertops curved up like a regular backsplash, but continued on right up to the bottoms of the upper cabinets, all one piece.
304

then he made a cut to the right side of the sink in the countertop to remove that part of the countertop covering those two lower sections of base cabinets.
306

his jigsaw didnt quite work in the sections the skillsaw couldnt reach so I used my oscillating tool saw to finish those cuts. the old countertop was glued down, not screwed. dad pounded it loose and we lifted it off. by then we were pooped.
303

307

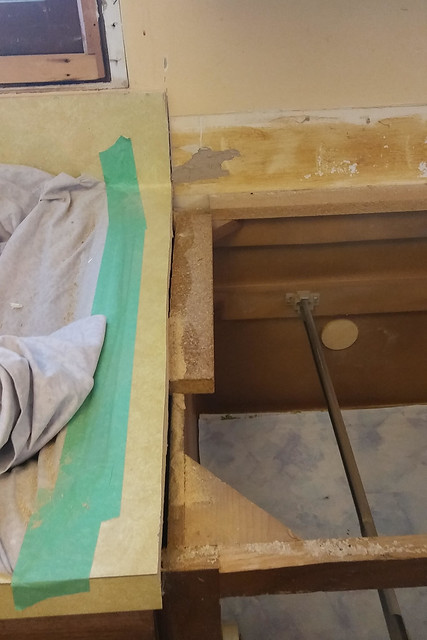
we also cut off the piece countertop over the dishwasher between the sink and the wall. here you can see how we cut the back of the countertops off.
308

the base cabinets without their countertop
309

the big piece of countertop
310

the two backsplash pieces we cut off (with outlet holes)
311

next up will be removing those two sections of base cabinet. and dealing with the floor underneath them that wont have the laminate flooring. the old sink is still in place so I still have a functional kitchen.

dad thinks when its time we can unhook the sink, leaving it in its countertop section, remove the old sink cabinet, put the new sink cabinet in place, put the old sink in its old countertop section back in place over the new cabinet, and then finish installing the other base cabinets. so that I'll still have a working sink until the new countertop comes and gets installed with the new sink and faucet dad bought me. somewhere in there someone will have to come out and measure for those new countertops.

Sunday, February 24, 2019

kitchen post 31 - hoisting up the last two uppers

I got the new 18" cabinet assembled and hung it in the kitchen. hoisted it to the counter. then hoisted it up onto my footstool on the counter. then hoisted it up to the railing. did the same with the remaining 15" cabinet. i decided i wanted the 18" closest to the sink, the 24" in the middle, and the 15" on the right end by the sliding door to the porch. not the same as the original plan layout, but better for opening and closing cupboard doors i think.

I got the kitchen sink cabinet assembled. then took the two skinny/standard metal rails off the top and replaced them with the special heavier rails to support the sink. then started to assemble the drawer, and ran out of steam before getting to the three drawer-fronts needing to be stacked and screwed to two vertical bars, and then get attached to the drawer. plus the drawer slides. maybe tomorrow.

316

Thursday, February 21, 2019

kitchen post 30 - hanging the uppers

dad came up on tuesday the 19th to take me to lunch and he helped me cut some pieces to fill a small gap smack dab in the middle of my kitchen floor where the laminate keeps sliding open. its been bugging me for a couple years. we pulled up the door threshold between the kitchen and the turtle/computer room, scooted the two lengths of laminate back up where they were supposed to be, then cut and fit in two tiny pieces of laminate between the threshold mounting piece and the existing laminate to hold them there. we're talking like 1/4" to 1/8" (half a centimeter) pieces. then we put the doorway threshold back down in place. it looks great now, no more gap. but i forgot to take any pictures.

then we talked about how to deal with the over-the-window/sink cabinet that is too tall and wont fit above the window. we discussed how to deal with still having a light fixture in over the sink. i use that light as a nightlight for when the roommate comes home or leaves when i'm sleeping. that way he can have a decently lighted path to get to the basement door in the dining room. the living room light switch is only by the front door so even if he turned that light on, he'd have to turn it back off and walk thru the living room to the dining room. it does no good and would wake me up. so having a light in the kitchen works best for both of us.

dad was able to use the pry bar to knock a couple staples loose from the joists up in the ceiling, that were holding the conduit tight in place. so now we have more wiggle room on how high we want to hang the light without having to cut the thru the metal conduit that was hanging a foot down due to the height of the soffits we removed. dad thinks we should get all the other upper cabinets in place and then we can cut pieces for however we want to do that light.

i finished painting the night before
297


next we measured and cut the railings to hang the upper cabinets and got the 30" cabinet in the corner up.
298

with not having that over-the-window/sink cabinet there, all the cabinets can move over two inches closer to the window. so there can be a filler piece between the 30" cabinet and the corner wall. and on the other side i can switch out a 15" cabinet for an 18" cabinet. we got the 24" cabinet hung, and then had to wait for me to run to ikea.
299


today i went to ikea and returned a bunch of stuff. ikea didnt even blink that the two cabinets were assembled (though the doors and shelves were all still unopened). so that was good. they said they have no problem taking back assembled cabinets. and i had the two boxes of remaining parts and the manuals. they said they just put them in their 'as is' area and people snap them up. so i returned:
- 36x15x15" over the window/sink cabinet (and two doors)
- 15x15x40" cabinet (and door, and four shelves)
- four 'low' drawers 30" wide from the two base cabinets
- two 'hidden' drawer fronts for those drawers

then i went upstairs to their kitchen department and bought more of the longer/wider handles and placed an order.
- one 24" long handle 2-packs
- two 18" long handle 2-packs
- three 15" long handle 2 packs
- 18x15x40" cabinet (and door, and four shelves)
- two 'medium' drawers 30" wide (their drawer heights come in low, medium, and high)
- two 5x18" drawer fronts
- two 5x24" drawer fronts

i also picked up some drawer organizers and these half-hoop utrusta partition things that screw to the bottom of the cupboard above my fridge so i can store sheet pans and muffin tins vertically instead of stacked.

i picked the right day to go. after yesterdays snowstorm hardly anyone was there at the returns counter. one person being helped, and then me. didnt have to wait long at all. it was a challenge, loading all that stuff into my little car to haul to ikea. then unloading it and hauling it inside to return. then hauling the new purchases out and loading into the car, and then hauling everything from the car into the house. hard work.

i wanted to fix the drawers right away. i decided i HATE those stupid hidden drawers and they had to go. but i still wanted two drawers up top, i just wanted them to each have their own exterior drawer front and handle. that meant ordering the new 5" tall drawer fronts. separating the existing 10" tall outer drawer front from the drawer, and the exiting 3" tall hidden drawer front from its drawer. then removing hardware that attaches the front to the drawer from the old and putting them onto the new drawer fronts. then attaching the 5" tall new drawer fronts onto the existing drawers. then i had to take the drawer slides off the cabinet for those top/hidden drawers and move them one screw hole farther out like all the other drawers. it was a bit fussy but i got it done. and i'm so happy with it.

the 'hidden' drawer, you can see the open space below where the other drawer with the tall drawer front fits
199

the tall upper drawer in place, hiding the hidden drawer
202

the two lower cabinets on the left are the ones i'm changing the upper drawers on
207

the new drawer setup where each of the two upper drawers now has its own proper drawer front and handle. no hidden drawer. i'm liking it MUCH better. and the new wider handles in place, which i'm loving as well.
300

and i discovered its MUCH easier to put the handles on the not-yet-assembled drawer fronts (and doors) while they're laying flat on a table before attached to the drawer, rather than once its already in place in/on the cabinets/drawers.

i want to get the new 18" wide upper cabinet assembled and get it up on the wall, but i dont think i can hoist it without help so theres no rush.