Tuesday, April 16, 2019

kitchen update # 43 - feeling overwhelmed with choices

theres so much to do. i feel like my brain is fried trying to figure it all out.

i did the fun stuff first - i organized my spices in my new drawers with the new spice organizer insert things from ikea.
417

this is the insert, theres four of them in the drawer. the gray zig-zag looking stuff prevents the spices from sliding back and forth as the drawer is opened and closed.
spice insert

i chose the more expensive drawers that pull ALL the way out, full-extension. the maximera drawers rather than the forvara drawers. definitely worth it!! and the maximera drawers have much heavier duty drawer slides. and they have the soft-close feature so they dont slam shut, they just quietly gracefully close.
416


i was looking at dishwashers, the choices are endless. the features i like (folding tines to make room for larger/odd shaped dishes that were difficult to fit in the old dishwasher) are only on the higher end models. but i dont need a $1000+ dishwasher! i'm thinking $500-600 is my limit. i do want a new dishwasher because mine was old and rusted when i moved in 15 years ago and has only gotten worse. i keep painting the tines in the rack with porcelain paint, and i bought these plastic caps that fit over the rusted out tines. it will be SO much easier to replace it when all the cabinets and counters are gone on that side.


i was also looking at water softeners. the one that came with my house died shortly after i moved in. or i should say it ran *constantly* and would blow thru a 40 pound bag of salt in a couple days. nothing i did would make it stop. i read the owners manual and tried all the adjustments and nothing worked. the internet said thats what happens when they get old, they stop regulating and just go full-bore.

i was considering maybe someday putting in a citric acid water softener system i saw on a home improvement show, but online reviews are pretty bad that it doesnt do all it claims to. so i started looking at regular water softeners. then i was trying to figure out what size i'd need, which meant figuring out how much water we use. its all overwhelming. and math dammit. but not having a water softener is kinda ruining all the faucets and showerheads and even causing the pinging in the water heater, possibly bringing it to an early death. its leaving scale on everything. i'm going to be putting in a new expensive kitchen faucet and i dont want to ruin that! the water hardness in this city is 32 grains according to the city website. and according to the internets that is extremely hard water.

but after poking around in the basement, i realized the way the water softener is hooked up - it *ONLY* freaking softens the kitchen water! its piped in on the far side of the house from where the water comes in from the street and goes to the two bathrooms. so it wouldnt soften the water for either bathroom because its piped down the line from them!! in my mind that makes it rather useless and not worth replacing. maybe someday if the roommate moves out, i might go thru the trouble of having a plumber cut open the wall and plumb in a water softner over there (in his living room) where it can affect the water for the whole house. that would involve tearing out sheetrock in both the basement bathroom and the basement living room to expose the main water shut off valve where the water comes into the house. and setting up the water softener over there in the living room area, and probably making a little closet to hide it. and then whatever renter i had would have to be adding the salt in, or i'd have to go into their area on a regular basis. but thats not happening anytime soon.

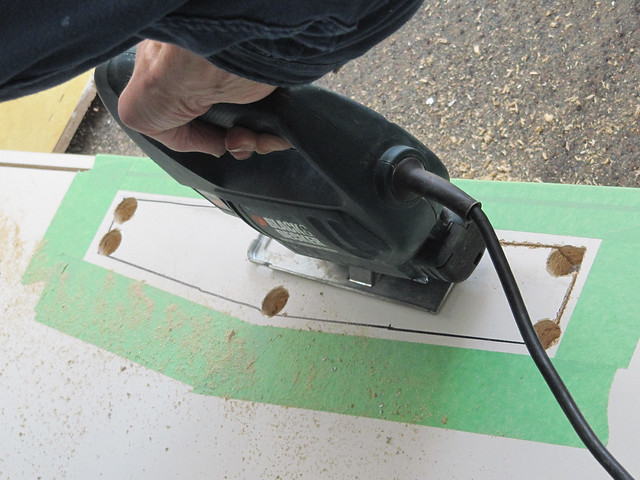
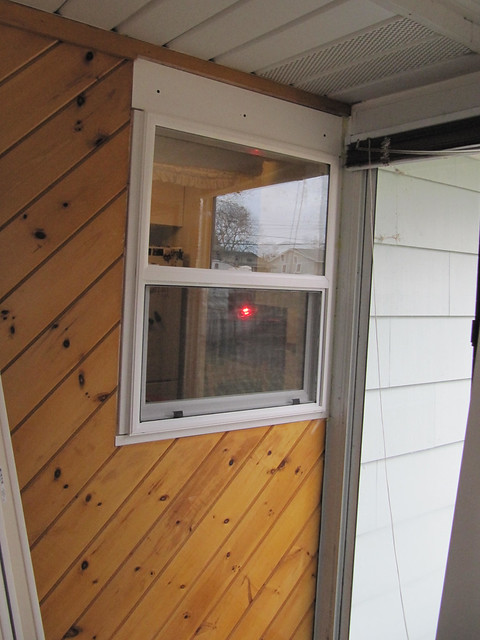
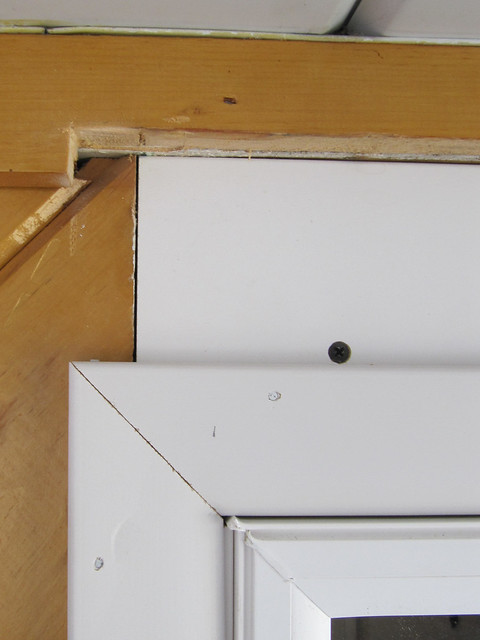
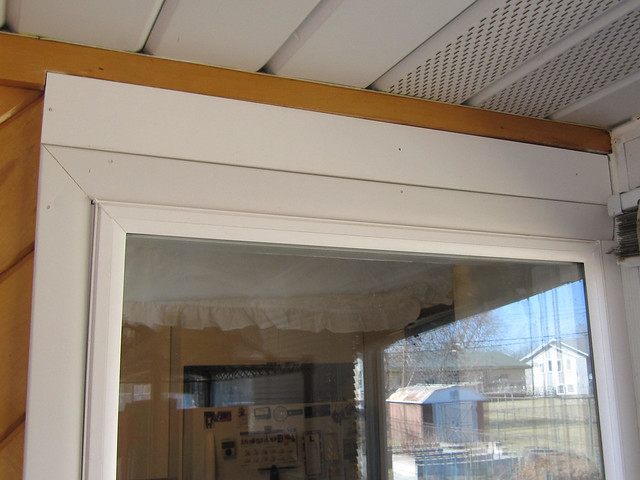
today i cut out the little block of wood off the wall above the porch side of the kitchen window, and fit in the piece of wood that dad cut for me. i used the oscillating saw to take that little corner out, it worked great. i had to trim about 1/8" off the end of the board to fit the space above the window trim, and dad cut the height exactly right. i painted that exposed end, then pre-drilled holes and nailed it to the wall above the window.


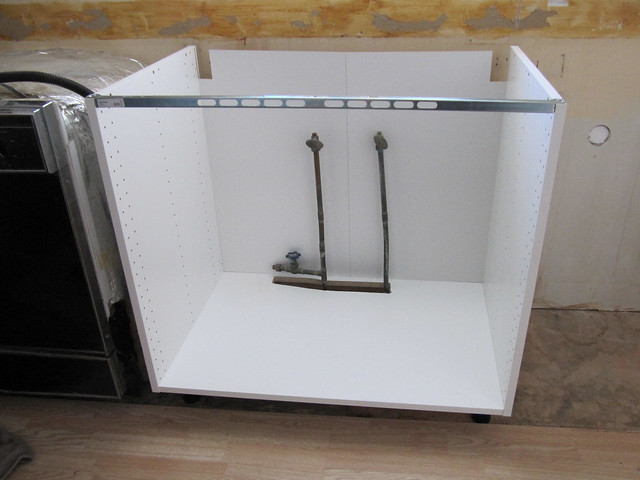
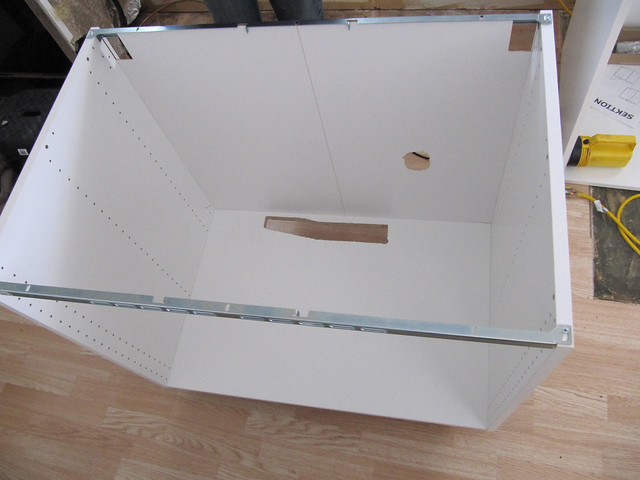
yesterday i assembled the last two kitchen base cabinets for the peninsula.
462

461

463

and i read thru the instructions for the base of the peninsula and how to attach it to the floor since being a peninsula, it doesnt hang from the wall like all the other cabinets.

i swept and vacuumed up all the sawdust we made on saturday, and washed out the filters on the vacuum. and cut all the hair off the roller.

i moved the chop saw back out to the garage. think we're done with it for now. its better to set it up outside where the sawdust mess can get blown away by wind than inside the porch.

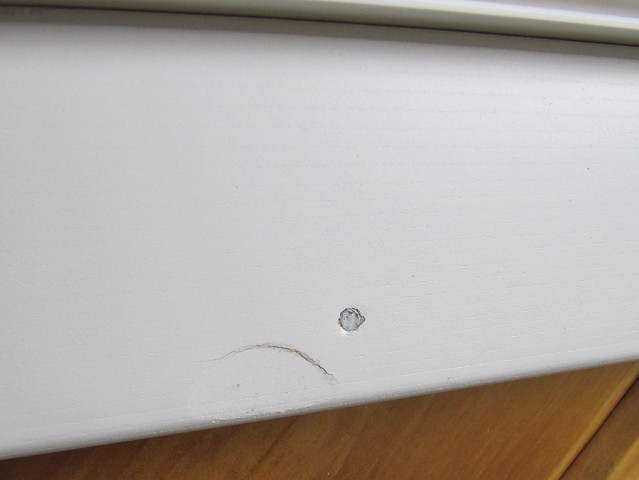
i put a little more paint on the kitchen walls and did some spackling/patching where the back of the countertop was glued to the walls.

the new door came! heidi inspected it.
420

this time the box is much closer to the door size and contained the same amount of packing as the previous oversized box had. and the door arrived unscathed!
422

a picture of the kitchen in the light of day, without a flash or lights on. its still a darkish kitchen lacking much sunlight thanks to the porch being outside the window. but its still 1000 times better and brighter than the old dark kitchen.
423

Saturday, April 13, 2019

kitchen update # 42 - sink cabinet

today was a LONG hard day. dad came up around 10:30. we pulled out the old sink and sink cabinet and put the new one it.
442

we disconnected the plumbing under the sink, starting with turning off the water with the copper pipe shut-off valves under the sink. then we disconnected the underside of the faucet from those copper pipes. then we disconnected the pvc drain pipe. then we shut off the valve to the dishwasher and disconnected all that as well.

then we pounded the countertop and sink loose from the cabinets as it was glued down. we lifted that off and carried it out to the porch.

then we removed some screws and some nails and pounded apart the sink cabinet. which wasnt actually a cabinet on its own. the cabinet to the right was a full cabinet. the cabinet to the left was originally a full cabinet but they cut out the front and bottom to fit the dishwasher in. the sink 'cabinet' was just a bottom piece between the two adjacent cabinets, with a narrow brace piece at the top back, and a fake drawer panel between the top front. it had no sides of its own. had no back. and the bottom, doors, and fake drawer front all have water damage after 44 years.
443

we carried the cabinet downstairs after getting it loose and prying off the sink boards. carried the boards from the sink cabinet out to the garage. we started breaking apart the remains of the corner cabinet behind the dishwasher to the left of the sink. then we went to arbys for lunch.


you can kinda see the cabinet behind the dishwasher. the front and bottom of it were cut away and the dishwasher was installed after the kitchen was. but the back and sides were left in place. we pried the side off while removing the other cabinet. sitting in front of the dishwasher are the pieces of the new sink cabinet. the other cabinet is the one that will be to the right side of the sink. plus the suspension rail.
445

when we got back we pulled the last of the cabinet pieces behind the dishwasher out and hauled it to the garage. then we brought in the bottom piece of what will be the new sink cabinet in and laid it on the floor in front of the pipes.
470

we started measuring and marking to get an idea of the size hole we'd have to cut to fit the copper pipes coming up from the floor, and the funky piece that sticks out from the side with another separate shutoff valve for the dishwasher. (the green painters tape is to protect the laminate surface)
449

heidi had to inspect once dad was done with the jigsaw. you can see the sink and the countertop out in the porch
450

the finished hole, a bit funky shaped because of the piece sticking out for the dishwasher water supply
451

then after we cut that out and made sure it fit around it, we attached the sides to the bottom piece of the cabinet. we put the front top rail on, but couldnt put the back top rail on until we put the back permanently in place, and we didnt know if we could get the cabinet lowered down over the copper pipes with the back in place. (you can see the funky pipe sticking out for the dishwasher). the back piece is just sitting loosely in place, not attached.
453

once it turned out we could get the base piece in around the pipes, we slid the back piece in place and marked it for the drain pipe that sticks out of the wall.
454

we pulled the loose back piece out and cut it.
455

after cutting it, we attached the back to the cabinet properly, added the top rear rail, and nailed the back in place.
456
but then we realized i marked the hole for only just the front edge/lip of the pipe sticking out of the wall. and it fit that exactly. except the pvc pipe got wider back beyond that front lip/closer to the wall where the cabinet needed to sit. so we had to pull the whole cabinet out and cut it again. we should have just made that hole MUCH bigger from the start. when cutting holes for pipes leave LOTS of extra room because it was a massive pain in the ass to lift the entire cabinet out and cut it a third time. the third time was because the hole wasnt deep enough to account for needing extra space to lift the cabinet up over the bottom lip of the suspension/hanging rail before setting down onto the rail.

there was also a problem with the back panel. its cuts for the rail mounts didnt go deep enough. its the only cabinet this happened to. we measured it against other cabinets and it is cut wrong, cut to a different depth from the top down, than the other three cabinet back panels. it is not assembled wrong. the green arrow shows the pencil mark where it wasnt cut deep enough.
457

i used a file to cut it so the rail mount would fit. (other side)
459

the rail mount, screws to the inside of the side pieces at the top, and stick out thru that hole in the back piece to hang on the suspension rail. this one is hanging on the rail.
469

we also cut holes for the dishwasher water supply and drain pipe. water kept leaking out the dishwashers drain pipe. it wouldnt stay where we put it. dad suggested next time we put duck tape over the end.

the subfloor under the old sink cabinet is not in great shape. after more thought, i'd like to replace it, even though it would mean disconnecting the sink and pipes and removing the cabinets again.

last of all, dad cut off the left side of countertop that was over the dishwasher. and he cut down the counter backsplash behind the sink to fit window trim.

the old countertop wouldnt fit low enough to connect the water pipes, so we took it off and chiseled away particle board that was glued to the underside to attach it to the old cabinets.

connected pipes, old sink and countertop, new cabinets
460

died of exhaustion.

Wednesday, April 10, 2019

kitchen update # 41 - window trim in the porch

monday i drove down to mom and dads house so dad could cut some stuff on his table saw for me. i brought up an ikea drawer-front that i managed to ding up in 3 places and had replaced. we used that drawer front to cut pieces to make a little platform to sit above the light fixture in the cabinet over the sink.
424

425

there is a hole for the light fixture, and the light's clips poke up a bit inside the cabinet and i dont want the light fixture squished or damaged.
426

so this little platform piece we built will just sit over it, protecting it from anything i shove up in that cabinet.
427


i also brought one long length of window trim for dad to cut narrower. the window is too close to the outer wall of the porch for a full piece of trim to fit between the window and the wall. dad cut that down for me too.
.4-2019  (15)


today/wednesday dad came up today and we cut the trim to fit around the new kitchen window on the porch side.
ready and waiting for the final trim
.4-2019  (14)

we used my chop saw (miter saw) to get the angles. which was handy because we needed not 45` angles but 46` to get the corner right.
.4-2019  (16)
i can understand why people would find window and door trim intimidating. its really easy to screw it up. i mean, cut it just a teensy hair too short and it shows dramatically. you'd have to re-cut it. dad had me make piece too long to test the angle cut and get the angle right first. once we found the angle, then nibble back at the length til that's right. it is a LOT harder to tell where the saw blade is going to cut when the saw blade is turned at an angle.

the skinny vertical piece we cut for between the window and the outer glass wall of the porch
.4-2019  (20)

we drilled holes for the nails, and did corner nailing too.
.4-2019  (17)

i managed to screw up and make one hammer dent in the poor window trim. i hope i can fill it with wood filler or something. its plastic/pvc window trim rather than wood since the window sits just above the sink inside, and will be potentially exposed to water. the plastic trim is much softer than wood. cuts pretty nice though.
.4-2019  (18)

we still need one more board cut for just above the top piece of the window trim, to cover the new window being shorter than the old one. dad took that board home with measurements to cut it narrower on his table saw.
.4-2019  (21)

i used the oscillating tool to cut a tiny piece of the wood away in the upper left corner above the window, so the new trim board will fit right
.4-2019  (50)

ready and waiting for the final board
.4-2019  (51)

the final board after dad cut it to size
.4-2019  (52)

pretty window all finished and trimmed out
.4-2019  (53)

we also spent some more time discussing how we'll take out the old sink cabinet and countertop, and different ways we might cut the new cabinet to get it fitted around the pipes coming up from the floor. dad suggested we can cut one large hole in the bottom of the cabinet to fit them all. then we can take that cut-out piece and make smaller holes for the pipes and with some undermounted support pieces of wood, we can put that cut-out piece back in so there wont be such a big hole. that should allow us to lower the cabinet in place around the pipes fully assembled and not have to deal with the back not being in place or long/tall holes for the pipes to pass thru to get it slid in place.

its going to be a long busy day when we do that. disconnect the water pipes and the drain pipes and the dishwasher pipes. pull the counter and sink off. pull the old cabinet out. hang the suspension rail. measure a whole bunch. make cuts in the bottom piece and back piece of the sink cabinet. assemble it and drop it in place. hope everything was measured right and fits right. replace the old countertop and sink. connect the water and drains and dishwasher back up. turn the water back on and check for leaks. it sounds easy typing it out like that. but getting those measurements and holes and everything lined up just right is going to be very exacting work. and if the plumbing goes wrong it could mean multiple trips to the store to fix. and dad would prefer not to solder copper pipes

i just realized i have not tested the shut off valves under the sink. if they dont work we'll have to shut off all the water to the house and replace them. i better go check that.

Friday, April 5, 2019

kitchen update # 40 - countertops and backsplash estimates

monday i had an appointment with home depot. and then two hours later with lowes, to get estimates for countertops. home depot went great. lowes pissed me off. menards, the other big home improvement store i usually go to, doesnt *do* countertop installation. they have a list of contractors you can call. that's it. they sell countertops only, their prices are for counters only, no installation. i'd have to contact individual contractors and get estimates for installation on my own. home depot made it the easiest, so i'll be going with them.

at home depot the lady printed me out full estimates for the formica countertop of my choosing, and just for shits and giggles, a quartz countertop, including installation. quartz is twice as much. not the economic option, even if it is pretty. so i'll be going with the formica as planned, when we get to that point. i showed up a little early to peruse their offerings and make sure the sample i had been eyeing was still the one i wanted, and to peek at the quartz as well. when i was done looking around the lady i had the appointment with was waiting at the desk for me. she was polite and helpful and even got me a little free sample of the quartz to take home with me. the formica had samples hanging on pegs that you could take, but the quartz samples (and others) were hidden in drawers below. she gave me her card and said to call with any questions. it was a pleasant experience. she got paged twice while i was there and told them she was with a customer. and another customer was impatiently waiting around, wanting this lady's time, but that customer had not made an appointment like i did. so she had to wait her turn.

at lowes, i also showed up 15 minutes early to look over their samples. the lady my appointment was with pounced on me IMMEDIATELY and dragged me over to the desk even though i said i'm early and i'm still looking. "lets get started!" so i sit and we get started on the estimate and she answers the phone and completely ignores me for the entire duration of the call, which involved calling someone else in the store and talking to them about their schedule, than going back to this first person on hold and giving them a time frame when they could come in and pick their kitchen parts up.

after about 10 minutes, it was the start of my appointment time, and she finally gets off the phone and starts in with me again. i had no idea the phone call was going to take that long or i'd have gotten up and gone to peruse the samples she'd prevented me from looking at. when she finally got off the phone we ended up going back to those samples because i couldn't tell her which one i wanted for an estimate! because she wouldn't let me look on my own. i didn't want to pick something out while she's standing there staring at me, trying to be 'helpful' and point out high end shit i'm uninterested in. thankfully she got pulled away by a coworker and i could finally look around like i'd wanted to. none of their quartz samples held any appeal, they were just all wrong. so just for the hell of it i had her do a granite estimate. waaay way way too expensive. she badmouthed the solid-surface countertops like corian. she said they scratch white, and scratch easily.

then she moved on to the formica estimate, and she didn't print me out the granite estimate. i asked her to and she did, and then left it on the printer and tried to move on again. i wanted to make some notes on the estimate about things she'd said, but she just bulldozed right on into the formica. i asked again for the print out and with a big dramatic fucking sigh she got up, walked over to the printer, and snatched it up for me. (was that really so hard?!!?).

then there were two more phone calls, which she immediately answered, turning her back on me and ignoring me again. the estimate was 1/3 the estimate of home depot. i told her so and she said "oh that doesn't include installation. we can't give you an estimate on installation unless you put down a $75 deposit and the installers come out and look. but it'll probably be twice this amount."

i'm just staring at her. i made this appointment specifically to get estimates including installation, not half an estimate. i told her i needed to present this to someone else and if she can't give me an estimate, then her store isn't even in the running.

more *big dramatic sigh*. like she honestly couldn't figure out why i wanted a print-out of the estimate! home depot printed the estimates out and gave them to me without me even having to ask. not this bitch. and once she realized she couldn't talk me into granite countertops, she got even less polite. i pointed out an error and she irritatingly redid the estimate bringing it up to about half the home depot one. and if installation costs twice that much, then they were about equal. it really bugged me that she didn't want to give me anything in writing. i'm aware these are ESTIMATES based solely on information i gave, not on the actual measurements the installers would take. i'm aware these are not firm price quotes. and she was so rude, tending to all the other customers before me, after i went thru all the trouble to make an appointment.

and that's another thing! i was able to make an appointment at home depot right on their website! one click, fill out information, click again, and done! lowes website i had to fill out a form and wait for someone to email me back. then she wanted to do the estimate via email! i had to tell her 3 separate times via email that i was trying to make an appointment with someone at the store do to an estimate in person. after that i finally got an appointment. what a waste of time that appointment was!

so the formica estimate was around $1700 for around 40 sq ft of counters and edges and backsplash pieces, plus installation, plus sink/faucet/dishwasher-hookup installation.
since my cabinets are all white, i chose the flint crystal pattern rather than a white countertop.
flint-crystall-formica-countertop-samples-3

more pics under here
flint-crystall-formica-countertop-samples-2
flint-crystall-formica-countertop-samples-1

the quartz estimate was around $3500. the color i chose was stellar night. but quartz is too expensive, so i didn't look very hard. i just wanted something not white, not off-white (which i hate), and not brown (the old kitchen was brown, i'm done with brown in the kitchen).
stellar-night-silestone-countertop-sample
stellar-night-silestone-countertop-samples
stellar-night-silestone-countertop-samples3

i've no clue what to do for the tile backsplash. the options are endless and overwhelming and i've no eye for what matches what. i might need to wait til the counters are in and i can *see* them in my kitchen before i can even start thinking on that.