Wednesday, March 27, 2019

kitchen update # 39 - the door finally arrived, damaged

i've been waiting for the 15x40" cabinet door to be delivered for my upper cabinets to be done.

fedex dropped the door off on my step today, two days after when the receipt said it should be expected.
408

in a box big enough to fit at least TWELVE of the doors. but it only held just the one door. needless to say there was NOT enough packing materials.
409

i opened the box and the door is clearly damaged.
410

both bottom corners are just smashed.
411

it was not an appropriate box for just one little door.
413

even the cardboard the door itself was wrapped in was trashed
414

that box was 4 inches too tall, over twice as wide as the door, and 5 inches too deep for only a skinny 1/2" thick door. they shoved just one door in that ginormous box with only a few cardboard paper pieces that were completely insufficient to pad or protect it.

the store still doesn't have any in stock and the website stock prognosis only says 'possibly' in another 10 days, check back later'. so not only do they not have it, they dont even know for sure when they'll get more. usually their website has a solid date for when more stock will arrive.

i went on their website and did their contact form and filled out the order number and receipt number and date and article number and explained the door arrived damaged. their contact form wouldn't allow me to upload my photos, saying it was the wrong format or too large. but it was .jpeg format which it said was the proper format. and it said it had to be under 20mb file size. the picture file was only 660kb which the internet says is 0.6mb so definitely under the file size limit of 20mb. i don't know what the problem was. but i sent the message off. we'll see how long it takes ikea to get back to me.

Monday, March 25, 2019

kitchen update # 38 - over the sink cabinet

yesterday dad came up and sanded down a high spot on the window frame for me. then we hit menards and found a light fixture for over the sink.

we cut out two holes in the top of the cabinet for the two conduit wires coming down from the ceiling with a paddle bit.
392

393

here you can see the two separate metal conduits coming out of the ceiling that we drilled the holes for. one on either side of the ceiling joist.
356

then i used my dremel with a mulipurpose cutting bit to cut out a hole for the light fixture on the bottom of the cabinet. i'd never used that before, and i didn't do a great job. the edges were a bit of an uneven wobbly mess. i'm sure if i practiced more i'd do better, but it was good enough. here is the cut out piece from the hole.
395

we held the cabinet up and pushed the metal conduit ends thru the top of the cabinet and then mounted it on the rail. dad attached the conduit ends to the electrical box and screwed the box to the top of the cabinet.
394

we attached the light fixture to the bottom of the cabinet in the hole i cut out.
396

and wired it in place. to attach the special box for the LED low-profile light fixture to the back of the cabinet we cut and shoved a slim plywood board behind the cardboard cabinet backing so we'd have something to drill into.
397

below the box you see that white wire? one end plugs into the other end. so in like 13 years when this LED light is expected to give up the ghost, i could buy a new light fixture. all i'd have to do is unplug the old and plug in the new. the light fixture is held up in the cabinet by two spring clips, so the whole thing would be quite easy to replace. it cost the same as a regular incandescent bulb fixture cost, and had a lovely flat profile, so we chose the LED instead of the regular type.

and poof i have a night light again! no more leaving the dining room light on with only one bulb screwed in.
398


then we worked on screwing all the upper cabinets together, but it didn't go quite right. when the over-the-sink cabinet wouldn't fit above the old window, we cut the rail for one side of the window and the other. when the window was replaced, i had to cut a new separate piece of rail and put it in between two different sections of already hung rail. i think i hung the rail for the over the sink cabinet just a teeny tiny smidge too high. like not even 1/16th of an inch. but it made it a bit complicated, screwing the cabinets next to it all together evenly. and made putting in the plastic lock for the suspension rail at the upper back inside of the cabinet not quite fit right as well. but we wiggled and fiddled and got it all screwed together and locked in place.
400


today i worked on putting the cabinet doors on and shelves in. but i couldn't lift the 24" wide 40" tall door and hold it up while i snapped its hinges in place so i had to wait til the roommate got home and ask for his help.
399
still waiting for the last 15" cabinet door on the end to arrive. it had to be shipped to me, ikea was out of stock.

i also screwed in the vertical divider things in the cabinet above the fridge for cookie sheets and muffin tins and such. i'm loving these things!
406

since i can only reach the very bottom of that cupboard, this works great for me. all i need to reach is the bottom edge of anything up there to grab and pull something out.
407

i need to visit the countertop places and get a firmer number and details on that so when we do get to the counters we have some idea.

Thursday, March 21, 2019

kitchen update # 37 - another trip to ikea

yesterday i went to home depot and got a collet set and cutting bit for the dremel. and i looked at wire-hide/cord-cover/wire-conduit things to hide the wire along the top, back, and bottom of the cabinet over the sink. they seem to maybe require special boxes, i'm not quite sure. i also looked at light fixtures and there's so many to choose from its entirely overwhelming. regular bulb, LED, recessed LED without the giant ceiling cans. i don't even know. i want dads opinion on this.

here's the dremel cutting thingy. the black plastic part lets you hold it flat against the surface you're cutting so you get a vertical cut.
386

the drill bit looking thing is the cutting part, you slide it sideways and make whatever shape cut you want.
387

and you can adjust the black plastic part to control the depth of cutting
388


i sorted all the ikea stuff and made a pile of things to return.
389

including the 18x40" upper cabinet i got to replace the 15" one when we thought the over the sink cabinet wouldnt work out. before the window got replaced and now it will work out. i measured to see if the 18" one would still work but my math skills are impaired. when i measured again i realized only 15" would work. so i had to go back to ikea after dad and i just went to return it and buy the 15" one.

so yesterday i went back to ikea and returned more stuff.
the 18" cabinet, door, and shelves.
the trim piece for above the fridge under the fridge cabinet that i opted not to use.
4 drawer fronts. two were outer drawer fronts that were the extra-tall/hiding the inner-drawer fronts, that i changed to smaller outer drawer fronts for all the drawers rather than the hidden shit. two were the inner/hidden drawer fronts i changed out to be outer drawer fronts.
4 sets of hinges.
1 set of door dampers.
and three sets of the 2" wide blanket handles that i opted not to use, choosing to go with the wider handles instead.

then i ordered the 15" wide cabinet, door, shelf, and a third support for the kitchen island like the instructions show to use. i meant to order two sets of shelves, but mistakenly only put one on my list so the guy only ordered one. i didn't realize it until i picked them up from the order pickup place and it was too late then. the door was SUPPOSED to be back in stock today, which was why i waited til today to go. but this morning their website changed it to tomorrow. *sigh*. i wasn't willing to go today after the library. and no way in HELL was i going to ikea on a weekend.

the returns came on 3 different darn gift cards. supposedly because they were on three different receipts. but i've returned other stuff from different receipts and they put it all on just one card. *rolls eyes*. seems nobody gets quite the same training in their returns department. i used one and a half cards to pay for the order upstairs in the kitchen department. then i went shopping. i picked up these tall u-shaped metal divider things for things like cookies sheets.

but best of all i found a new curtain rod for the sliding glass door to the porch! one long length with only two hanging mounts on either end instead of the stupid mount in the middle that my current rod has. the stupid middle mount stops the curtain from being able to be pulled ALL the way back or even halfway back. i'm excited about a curtain rod.
402

401

the old curtain rod with its three mounting brackets (that were flimsy and got bent out of shape)
403

ta da!
405

a cute photo of puppy *helping* me make the curtain back in 2006.
082806-81
(my dungeon basement with its old dark paneling that is all gone now, you can see the theme in this house with the dark woodwork, dark basement, dark kitchen).

cuz tennis balls always help with sewing
082806-79

then i assembled the 15" cabinet. i struggled a bit but got it hung up on the suspension rail by myself. so everything is ready and waiting dads next visit. we'll get that over the sink cabinet up with all its cutting and wiring.

i did some more reading about how to assemble and attach the peninsula part of the base cabinets. found some suggestions about possibly screwing the sides of cabinets together before they're fully assembled since one faces forward and one faces backward and the back of the cabinets will interfere with clamping to screw together once they're installed. but i figured out how the supports for the peninsula work, how they adjust up and down to level the cabinets so the countertop will all be level even without them being on the suspension rail like the other two cabinets will be.

Monday, March 18, 2019

kitchen update # 36 - change of plans and back to ikea

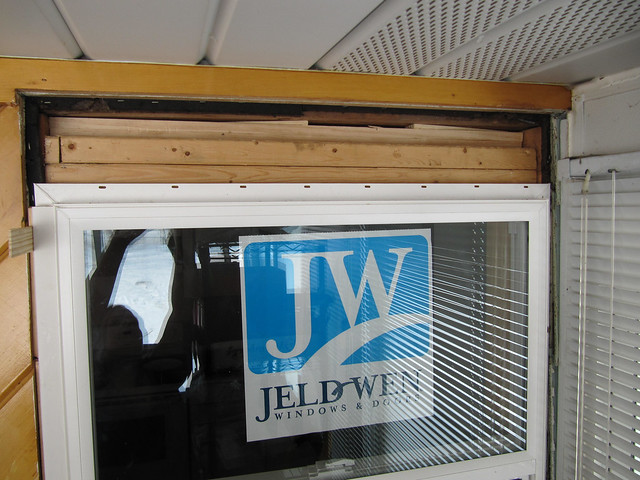
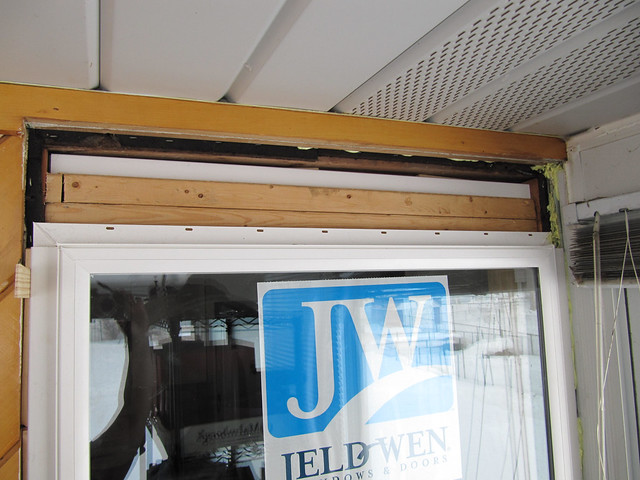
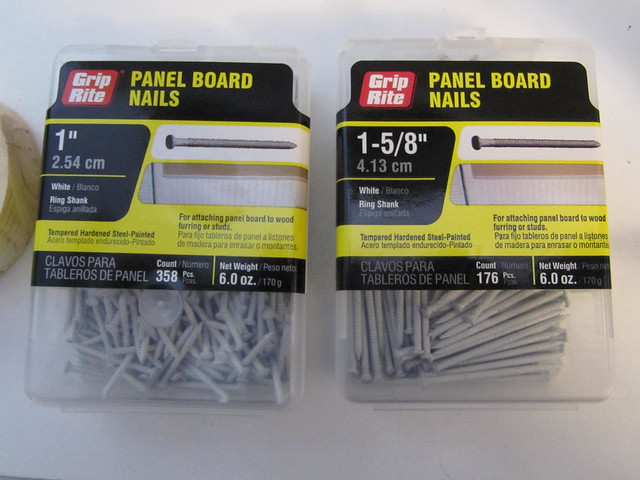
yesterday dad came up and looked at the new kitchen window. we went to the home improvement store and got skinny little trim nails and glue.
385

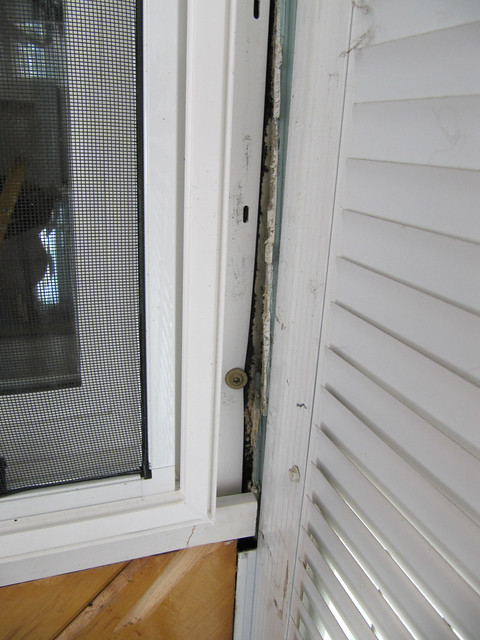
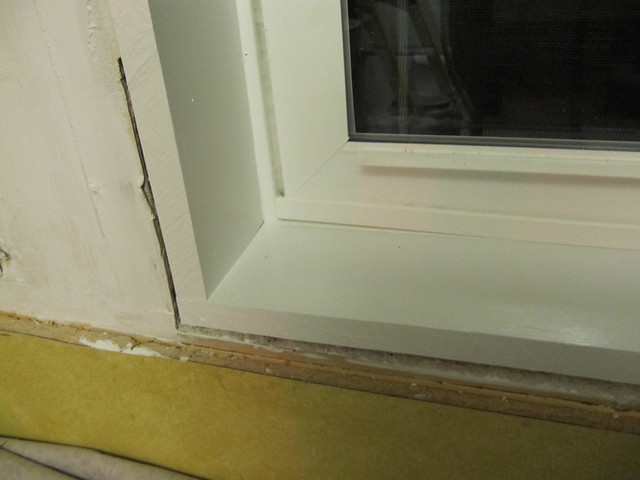
we realized the old countertop behind the sink comes up too high to put the window trim on right now with the sink counter still in place. and we cant cut the countertop lower with dads skilsaw/circular saw while its still in place because the faucet is in the way. when we take the sink cupboard out we'll cut it down then.

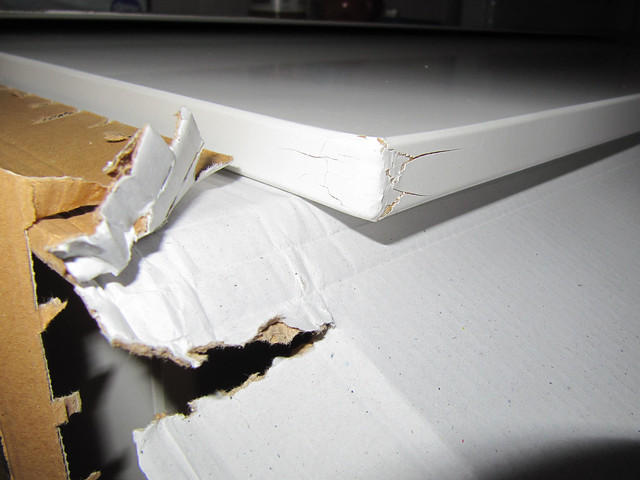
dad helped me remove the lower peninsula/corner cabinet that i couldn't get loose on my own.
382

turns out it was stapled to the cabinet between it and the sink cabinet with 6-7 large staples.
384

we had to pry it apart to pull the staples out, but couldn't... because of the laminate flooring raised up all around it. it wouldn't move. so first we had to pry the cabinet *up* off the floor and above the laminate flooring. while doing this my pinky finger got pinched.
391

but after we lifted it up above the edge of the laminate flooring, we got that cabinet pried away. its ready to carry down to the basement, but i'm not up for that yet. its very big and heavy. you can see the laminate flooring around where the old cabinet used to be.
383


we were going to remove the cabinet next to that, but turns out its all one piece connected with the sink cabinet. there's no way to pry them apart without destroying the sink cabinet. and we're not ready to do the sink cabinet yet. we'll have to cut apart/destroy the old sink cabinet around the copper water pipes and drain pipe just to remove it.

and we'll have to do a bunch of cutting on the new sink cabinet to make it fit around the copper supply pipes which come up from the floor, and the drain pipe goes back thru the wall. and the dishwasher pipes to the left.


after some discussion we decided to return the new sink cabinet that i had already assembled, and get one not yet assembled as it'll be easier to make those many different cuts on the individual pieces before its assembled. easier to just start over with a new ikea cabinet than to try to disassemble it after the back has already been nailed in place. plus ikea refunds the full price even if its already assembled.
390


heres a big bummer: its turning out that the pull-out drawer i wanted *SO much* for my trash and recycles under the sink, would have to be cut down about two inches in one spot along its back to fit underneath the sink trap drain pipe. and that cannot be moved up and still drain properly. i was very sad to think we'd have to return it all and just get two regular cabinet doors and not have that pull out trash drawer. dad thinks we can maybe cut it. it might lose sturdiness though. the back part of that drawer where it would be cut is metal, so it is pretty sturdy. but if it goes wrong, it wont be returnable if we cut it.


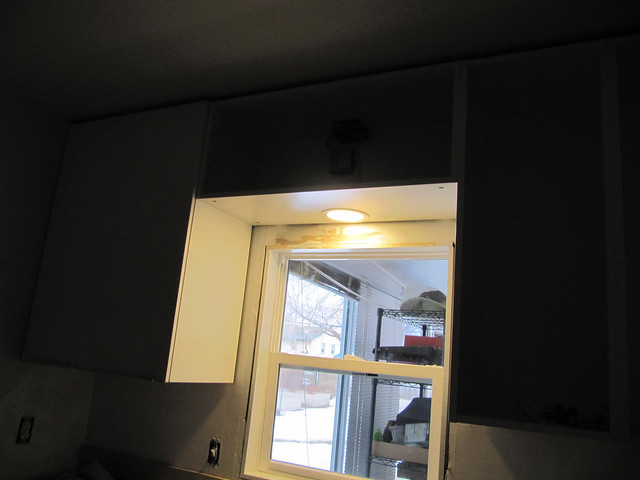
with the new window being shorter than the old, there's now space up above that window for that upper cabinet again. except i already returned it and all its pieces... *sigh*.

so dad drove us down to ikea and returned the assembled kitchen sink cabinet and bought a new unassembled one. we re-purchased the upper cabinet and doors and hinges all over again. wheeee.

at the checkout, something weird happened. they couldn't read dads card, their card reader wouldnt work. his card worked just fine for him earlier that same day.

this is the third time their checkout register has screwed up! once it shut down and voided my card with a store credit on it. the second time the register wouldn't read credit cards, but i'd already been rung up and half paid with store credit. it wouldn't let them un-ring it and put the money back on the store credit so i could go to a different register to pay. this third time their registers screwed up and again wouldnt read credit cards. the poor cashier said this happens quite often and they've all bitched to management but nothing changes. way to go ikea!


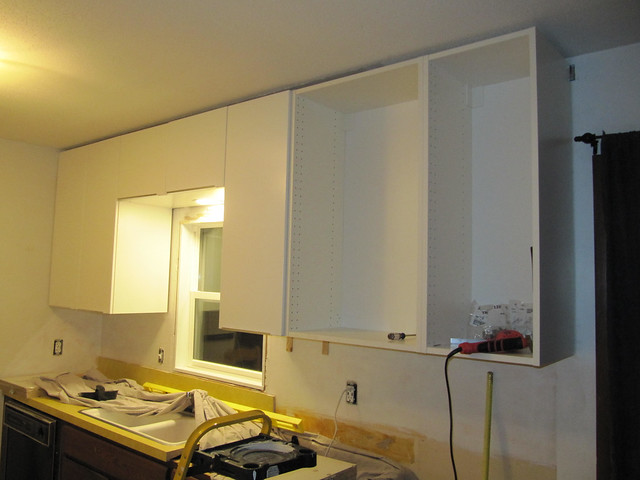
before we left for ikea, i THOUGHT i measured right and that i could keep the 18" cabinet to the side of the above the sink cabinet, but now that we're home and unloaded, i measured again and it is too wide. i'll have to return that 18" one and go back to the original 15" cabinet i had before realizing the cabinet wouldn't fit over the old kitchen window. (i had previously returned the original 15" wide cabinet with the over-the-sink cabinet when it wouldn't fit). pain in my ass. i DID measure, and technically i measured right. i just did *math in my head* and that equals math failure. so phooey. calculators are the way to go! i looked online to check stock for all the pieces parts and monkey farts, and the door for that 15" cabinet isn't in stock and wont be til maybe next thursday. so looks like i have another trip to ikea in my future. dammit.


i assembled the upper cabinet for over the window. i cut the hanging rail piece to fit, and i leveled and screwed the rail into the wall. definitely could have used another hand holding it while i screwed it, but i eventually got it done on my own. i could have waited for dads help but was impatient.

i can't install that cabinet til dad comes out with his jigsaw and cuts some holes out for the electric box to fit thru top, and the light to fit thru the bottom. (for the over-the-sink light fixture).

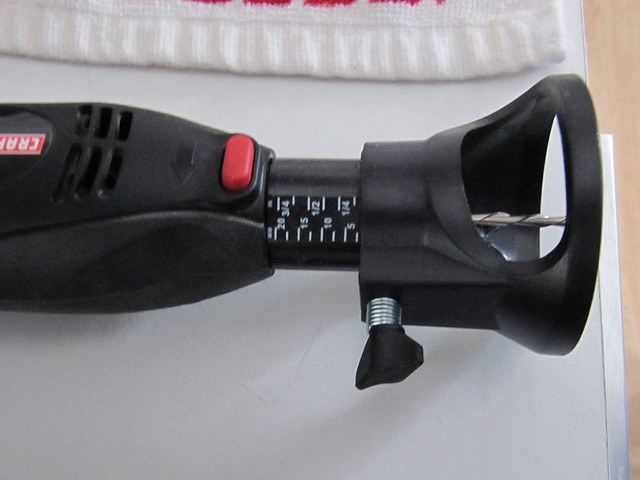
or maybe i can find the right attachment/bit for the dremel to do it myself. there's an idea! i googled what bit i need, and i'll need a collet set to secure the bit to the dremel head because mine only came with one size and the internet says i'll need a different one. the collet is the teeny round metal thing that fits between the bit and the inside head of the dremel tip. looks to cost around $5 for the bit, and $7 for the collet set. and its in stock at home depot. guess i got another trip there in my future too.

and i suppose i should be looking at light fixtures to make sure one will even fit there. i haven't looked into that at all! the old fixture had to be cut/deformed to fit the old upper cabinets that were only 12" deep, so it got thrown away. the new upper cabinets are 15" deep.

feeling overwhelmed now. time to quit thinking.

Friday, March 15, 2019

kitchen post 35 - kitchen window part 2

i texted the window guy pictures of the exposed sheetrock and last night he came back out and bought some wider boards and cut new pieces of window sill all around that came out farther covering the sheetrock. the new window sill got nailed over the first one he put in place.

its a little dark, i tried to lighten it up. you can see the wider windowsill pieces that come out even to the outside edge of the sheetrock instead of stopping behind it.
.3-2019 (143)

.3-2019 (144)

now there will be room for the cabinet up above the window!
.3-2019 (145)

today after the library i went to lowes and picked up the window trim, plus some other boards to fill in the porch side of the window.

i also bought a 2'x2' piece of sheetrock and cut that to fit above the window on the kitchen side and screwed the two pieces in place. leaving that side ready for the window trim after a bit of mudding and painting. i very much appreciated that i didnt have to buy a whole 4'x8' piece of sheetrock. and this 2x2 piece fit handily in my car. smart company to sell these user friendly sizes.
.3-2019 (150)

the window on the porch side, needing a bit more work to finish it off besides just plain wood trim.
.3-2019 (151)

close up of the top. he did what he could with what he had. and i opted for the cheaper price by finishing it off myself rather than having him do it.
.3-2019 (152)
normally the flashing sits outside the outer wall. but with there being no outer wall between the old window and the outer wall of the porch, and the new window being shallower/skinnier in depth, he set it back into the wall a bit. if you look to the left, you can kinda see the shims sticking out. one of the pieces of trim i got was only 1-1/8" wide (2.85 cm) and 3/8" (0.95cm) thick. fit damn near perfect!

i brought my chop saw into the porch and started cutting stuff to build out around the flashing to make the window even to the diagonal pine shiplap. (the window was nailed to the exterior of the house, which used to truly be the exterior before it was enclosed in the porch. the siding was removed and the shiplap put on.)

bottom and side filled out and shimmed and glued in place making it even with the level of the pine shiplap so regular trim will sit flush.
.3-2019 (153)

it took quite a bit of fiddling and some careful shimming in places, and gluing to make everything fit *just* right. and i ended up having to go back to lowes and pick up 3 more of those skinny strips of trim that fit especially well in the gaps.
.3-2019 (154)

below the window, i tried to force the piece in and it broke, so i cut it better and glued the little broken right end back in. fit great, and will be entirely covered by the outer trim.
.3-2019 (155)

if you look to the right of the window, you can see some of the edges of the blue siding pieces. yup. thats the outer wall of my house. the porch was added on top of it. it was all just cut off. i ended up using spray-foam insulation and closing all the gaps behind the siding pieces. you can also see the mini-blinds that are closed.
.3-2019 (156)
.3-2019 (157)

i also cut and placed another of those thin trim pieces between the window and the outer porch wall window. you can see some of the spray foam insulation showing. i added more after i got this piece firmly in place. i didnt want the foam to push it out as it expanded.
.3-2019 (158)

above the window i filled in a gap on the very top with 3 strips of the skinny board. and added more spray foam insulation.
.3-2019 (160)
.3-2019 (161)

then i cut a piece of sheetrock and screwed that in place. (no picture). then i cut a special pre-painted MDF board that was 1/2" x 5 1/2" and drilled, countersinked, and screwed that in place after i cut it to the right length. so now the porch side is ready for window trim. it was very dense board, very difficult to drill thru and screw into.
.3-2019 (162)

TA DA!
.3-2019 (163)

after that i taped and mudded the interior sheetrock over the kitchen window
.3-2019 (164)

and painted the interior wood frame windowsill. now theres room for that cabinet i wanted!
.3-2019 (165)

pretty
.3-2019 (166)

picture better showing how the new windowsill is now flush with the sheetrock so new trim will attach just fine
.3-2019 (167)

should have maybe shimmed this corner of the sheetrock above the window, it wasnt flush in that corner and needed lots of extra mud/spackle to make it flush with the other walls and windowsil.
.3-2019 (168)

and after that i collapsed in bed, hurting very much. but i wanted to get everything ready for sunday when dad comes so he can help me with the mitering and putting up the window trim. and i need time to paint more and let the paint dry.