we measured twice and cut once but some of the measurements ended up wrong because the floor is a floating floor and is uneven. so the measurement was correct where i took it, but was not the same measurement across the entire floor along the backside of the peninsula cabinets. the two panels for the backside of the peninsula where that floor was uneven - they both needed only 1/16-1/8 inch taken off the height - even though the end panel around the corner from those two back panels was exactly the right (same) height. when we installed the laminate floor 8 years ago it was because the subfloor was uneven and the laminate 'floated' and disguised those inconsistencies. anyway, the peninsula end panel that was the right height, i think i should have written 5/16 but i wrote 5/8 so it was 5/16 (half of 5/8) too wide. oops.
one panel was right on! the base panel on the stove/fridge side by the living room door. so we were 1 out of 4. *sigh*. that was frustrating.
we got that one cover panel installed and it looks great. we had to carefully make a little notch at the inside top corner to cover up where the suspension rail extended just a tiny bit past the end of the cabinets to find the stud.
the extending suspension rail

the notch we made in the upper inner corner of the panel

the end panel in place

then we put a strip of painters tape (easily removed) on all the remaining panels and marked them with arrows as to which edge to cut and what size to cut to. packed them back in their cardboard, and sent them back home with dad. so its right there already worked out. cut that edge only, to x size. the end. next panel.
we also measured up some sizes for the filler panels between the peninsula cabinet and the wall by the porch door, and the L shape of the inner corner by the peninsula that will take two pieces to match up just right.
PART 2
that was like last week some time. dad did the re-cutting and cut the first three filler pieces and brought them back up so we could try again.
the filler piece between the peninsula cabinet and the porch door was just a smidge too wide, needed 1/16th taken off to fit. so i marked that and sent it back home with him. the two L pieces for the peninsula inner corner fit perfect! yay! but they'll need to be glued to a couple other pieces to allow me to screw them in place.
the gap between the peninsula cabinets and the wall by the porch door

we got the peninsula end panel on great! got the first backside peninsula cover panel on, but had to shim one corner of it up from the floor ever so slightly to make that outer corner align perfect from top to bottom.

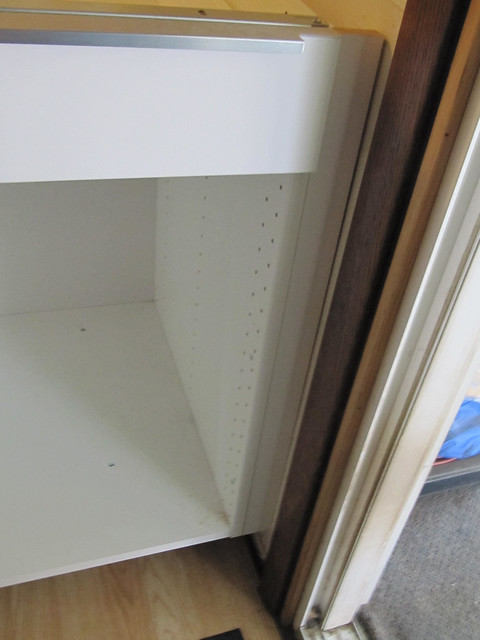
the last back panel piece for the peninsula next to the drawers ended up a little too narrow for my tastes. by at least 1/8". this happened because the back edge of the peninsula end panel was cut so that the front edge would remain finished. that back edge needed to be overlapped with an uncut edge from the backside panel. well that back panel ended up having to be scooted out just a tad more than what we measured to fully cover that cut edge. which left a gap between the other back side panel. so damn fiddly, grrr. if we'd waited to cut that last back panel until we had the first two installed we'd have been ok. but since the table saw is at my dads house and my kitchen is at my house... we marked and cut everything at once.

i didnt like that gap, but didnt to buy another panel. (these cover panels are NOT cheap!) the gap exposes the unpainted back side of the cabinet. dad said i could paint it. i said i wanted to think on it. it seemed too large a gap, something i'd see every time i passed it and regret 'making it work'. but sometimes i overreact, so i needed time. i clamped it in place and walked by it for a few days and decided i was right, too big a gap, i couldnt do it.
PART 3
thursday mom brought up the re-cut filler piece for by the porch door and it fit perfectly. well, not perfect as the wall wasnt straight, but caulk will fill in the gap near the top.
i glued another piece to the filler piece and screwed thru the cabinet into that L shaped piece to hold the filler piece in place.

thursday afternoon i decided to do something with that busted cabinet door - the one they mailed in a box that could have fit 12 of them, where the bottom edge was all dented up. (they sent me a new one, packed in a more appropriately sized box with less room to shift and bang about in a UPS truck. they didnt make me return the damaged one.) so the damaged door has just been sitting around.
it was long enough and wide enough the busted end could be cut off, and the edge of the door with the pre-drilled hinge holes could be cut off as well. so i put a piece of painters tape and marked the edges to cut and the sizes to cut with.
i took the too-narrow panel piece and marked it with the size to cut for the filler panel between the dishwasher and the wall. it was already the right height. and that is a wider filler piece, just over 5" wide. we still have to figure out how to attach that one. seems like something we maybe should have figured out before installing the dishwasher...
i also measured the two UPPER cabinet end/cover panel pieces and taped and marked those up. so thats 4 panels. then i measured the filler piece up above the cabinet over the stove, since we dropped that cabinet down from the ceiling a little so it would have the exhaust vent hood at the right height above the stove. we cut the piece going across back then. but to install it... how? so i measured from that cut piece panel back to the wall and we'll turn it into a u-shaped thing and screw THAT to the side cabinets. voila. ...this probably needs pictures to explain. they'll come.
then i measured the last remaining strip of laminate flooring i have (they discontinued it, no more is available) to have dad cut that into thirds, and hopefully we can put that in place along the sink side cabinets between the edge of the existing floor and where the toe-kick will go and fill that gap
No comments:
Post a Comment