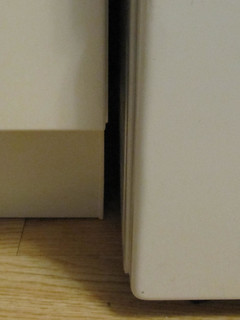
heres the 18" cabinet between the fridge and stove. the black clips slide or twist into a grooved area on the back of the toe kick.

the clips snap around the cabinet legs

we hung the cabinets just a little bit higher than the suggestion because the suggested height meant the adjustable legs would be as short as they could go and couldnt adjust any shorter. my floor is uneven. all my cabinets are level, but the toe kicks are just a little bit short.

but you cant tell unless you're down on your belly on the floor

the cut end of the toe kicks went against the end panels, and the end towards the stove got an end cap type piece that snaps on. i had to cut the toe kick twice because i cut the toe kick to size, but didnt account for the added end cap piece. here you can see it lines up perfect with the end of the cabinet, so it cant be caught if the stove is pulled out.

the cabinets on the other side of the stove were 42".

sliding the clips in place

the clips had to be lined up right with the legs so it could be snapped in place.

looks so nice! and no more tennis balls under my cabinets, hehehe.

again with the end cap piece on the stove side

and again with the gap you cant see unless you're down at eye level

i *tried* to work on the toe kicks on the other side of the kitchen, but complications prevented that.

on the peninsula, the 24" cabinet that faces the dining room was the first problem. the back side of the 30" cabinet has end panel pieces going all the way down to the floor along the outside back edge. the toe kick for the 24" cabinet is recessed back under to connect against the cabinet legs with the clips.

but that leaves a gap between the toe kick and the back panel on the left end. i got the piece cut to length though.

and on the other side, the inner corner/kitchen side of the peninsula, things went wonky as well.

(a peek at the way the peninsula cabinets are attached to the floor)

i thought the cabinet legs would be equal distance from front and back. nope. they do not line up. the back legs are closer to the back of the cabinet than the front legs are to the front of the cabinet. back leg of the cabinet that faces the dining room on the left, front leg of the cabinet facing the kitchen on the right.

they're not even. so the toe kick wont attach right.

and the laminate floor is also SHORT there. and we have no more left and the laminate flooring is discontinued and not even available online anywhere. it was 11 years old.

and until i get that piece in place, i cant cut the piece that goes along the sink cabinet. will have to talk to dad about these challenges.
i also set pieces of the trim above the upper cabinets (they're just sitting loose up there, not installed), choosing the curved edge facing out (top)

over the flat edge facing out.

curved edge

flat edge

its a subtle difference. but the more i look at it, the more i dont really like either edge.
they're boring.

maybe i'd like the more decorative trim piece better. but that will require another trip to ikea.
and theres a problem with this trim. the underside isnt finished. when you open the door you can see the unfinished brown. i'd have to paint it white. i dont like this.

No comments:
Post a Comment