Monday, January 20, 2020

kitchen update # 67 - contact paper backsplash

at target i picked up some peel-and-stick removable wallpaper with the pattern of subway tiles on it.

this stuff
https://www.target.com/p/devine-color-textured-subway-tile-peel-38-stick-wallpaper-black-white-threshold-8482/-/A-50513237

its like contact paper. i could pull it off and reposition it multiple times to get everything lined up perfectly. and whenever i get around to figuring out what i really want as a tile backsplash, it'll pull right off, easy peasy, just like contact paper does.

it comes in vertical rolls like most wallpaper does, rather than horizontal, which would have been easier for the backsplash. its 20 inches wide (51 cm), so i had to cut lots of short sections for that backsplash area and spend a bit of extra time lining them up. but it actually wasnt too bad to work with, being able to be repositioned.

it took me a while to get it all in, but i'm happy with it. it's easier to wipe clean than the walls underneath, which arent perfect because they didnt need to be, because they'll eventually get tiled over. it does show some of the imperfections of the wall underneath, but i dont much care because its temporary

.1-2020 (41)

.1-2020 (50)

.1-2020 (55)

.1-2020 (89)

stove/fridge side finished
.1-2020 (53)

sink side finished
.1-2020 (90)

now that its all in place, it did make me realize that plain white subway tiles (which would be the cheapest way to go) look REALLY plain and boring next to the white cabinets and mostly white counters. i definitely need more color or pattern there. which is kind of what i expected, and why i havent settled on backsplash tile yet.

.1-2020 (54)
.1-2020 (91)

at least now i have plenty of time to figure that out. no rush. no pressure. i can take my own sweet time and check out tile places other than the big home improvement stores. see if i can find something i like, that wont break the budget. its a big kitchen and will require a LOT of backsplash tile, which gets cost prohibitive fast.

Monday, January 13, 2020

kitchen remodel update # 66 - adding an outlet

dad came up today and we were going to change out a single set of outlets and put in a wider electrical box that would fit two sets of outlets.

that outlet is a special outlet with USB charging ports in it.
.1-2020 (78)

i want to install my under-cabinet radio, but the bulky plug for that would partly cover the USB ports, rendering them useless. i use those usb ports all the time! thats where i charge my phone, my kindle, my mp3 player, and my camera battery. but if i add a second set of outlets right next to it, then i could plug in my radio in on one side, and still have access to my USB charging ports on the other.

since the existing outlet is only a single wide, we'd have to pull everything out and then remove the outlet box from the wall. this would mean making a hole in the sheetrock so we could pry the old box away from the stud it'd be nailed to, and then installing a double wide box. and then doing sheetrock repair.

happily, it turned out we didnt have to replace the box!! the one that was in there already WAS a double wide box. it just had a single wide metal plate on the box for the outlet and cover to screw into. so we went to the store for a double wide metal plate.

existing single wide plate cover on the right, new double wide plate cover on the left
.1-2020 (84)

dad carefully cut away the sheetrock around the single wide opening to make it as wide as the double electrical box so we could get the old metal plate off and put the new one on. but he cut away only just exactly enough sheetrock, so we didnt even have sheetrock repair to do!
.1-2020 (80)

heidi helped (i had to warn dad heidi had flopped down right behind him)
.1-2020 (81)

then dad wired in the second outlet. it was a very busy box because all the kitchen outlets were wired to TWO circuit breakers. black wire, white wire, and RED wire. three sets of wires coming into the box and being wire-nutted together to connect up and then go back out for the next outlet down the line.
.1-2020 (82)

the messy box, adding a ground wire in
.1-2020 (86)

we had trouble getting all those wires pushed back into the box in a way that would allow both sets of outlets to be pushed all the way in. on our first attempt, one of the wire nuts came off, so we had to pull it all out and twist those wires back together again putting the wire nut back on. then we did some more rearranging and pushing and got them all in. that special USB charging outlet is a larger outlet than the regular one and was harder to fit in.
.1-2020 (87)

eventually we got them all in place and got the cover put on. yay!
.1-2020 (88)

flipped the breakers back on and all the outlets work. double yay!

dad and i were greatly relieved to not have to replace the box and not have to do sheetrock repair.

Wednesday, October 9, 2019

kitchen update # 65 - maybe the last trip to ikea

i drove out to ikea today and returned the 7 pieces of trim for above the cabinets. they're the last of the stuff i'd have to return before october 22. ikea gives you 365 days to return stuff.

i returned a drawer i'd picked up a replacement for the last time i went in. i changed out the same medium drawer front to the new taller/high sides drawer. i wanted the sides to come all the way up rather than just halfway like the medium height drawer sides do.

i also returned a set of shelves i picked up last time where i accidentally bought the 24" wide ones but i meant to get the 15" wide ones.

then i picked up 3 more pieces of the new bodkin trim pieces to go with the one piece i picked up last time. hopefully this will be the very last. we'll see.

Friday, August 30, 2019

kitchen update # 64 toe kicks

we worked on the toe kicks for the sink side cabinets. they were a bit tricky.

for the cabinet nearest the porch door, dad figured out that we could clip a little piece of the toe kick going sideways on the cabinets leg NEXT to this cabinet, and then cut the toe kick piece to butt up right against that. otherwise there would have been a gap between the toe kick under this cabinet and the back panel on the cabinet next to it. so we got that one in.
771

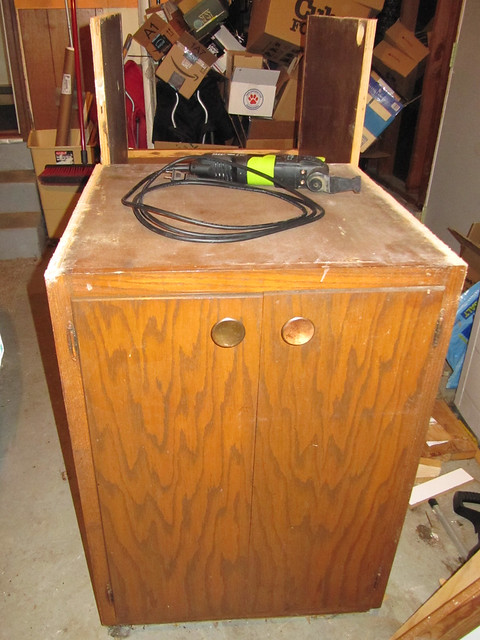
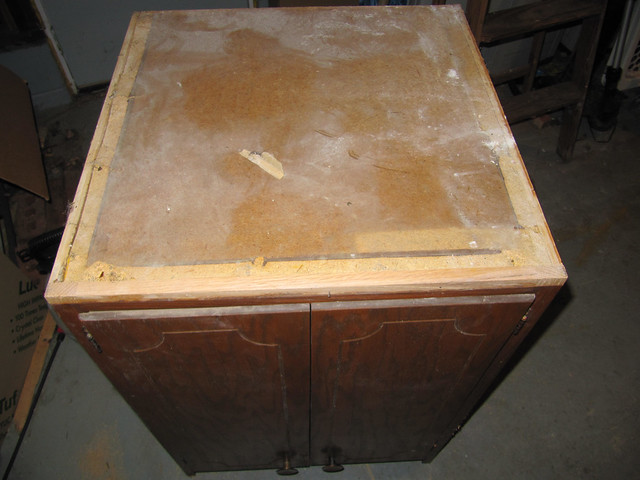
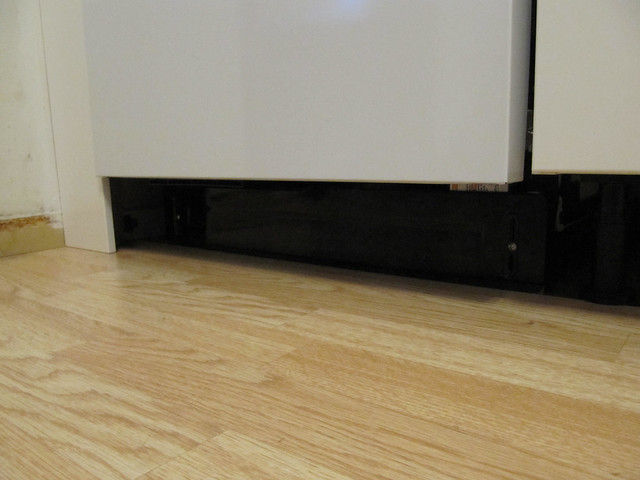
that short little piece on the inner corner under the cabinet is the one we had to find a way to secure. this is the before picture without it
617

looks good. still need to put the baseboard trim back on the right end.
772


then we worked on how to do the inside of the peninsula. because of the corner cabinet facing the dining room, the legs at the back of that cabinet did NOT line up with the legs on the front of the kitchen-facing peninsula cabinet. the toe kick would be at a funky angle.
622
so the piece wouldnt clip on right.

plus i had no more laminate flooring left, and there was a gap there if we snapped it to the legs as intended.
623

so dad screwed a 2x2 board into the subfloor right at the end of the laminate flooring, in front of the legs.
773
774

then we screwed the toekick to the 2x2 board. voila, gap in flooring covered, toe kick straight from left end to right end. win!
775

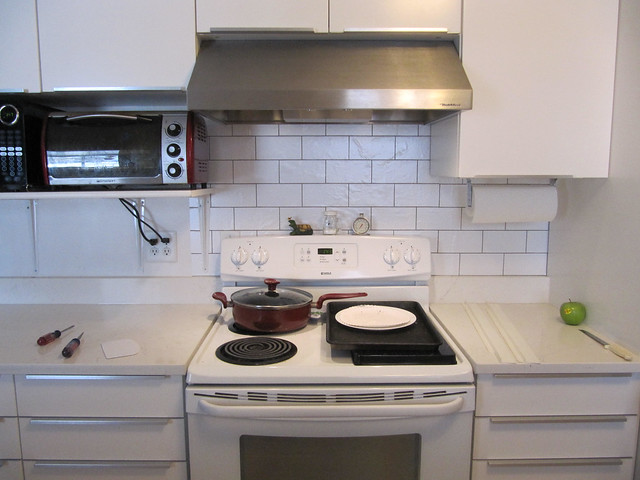
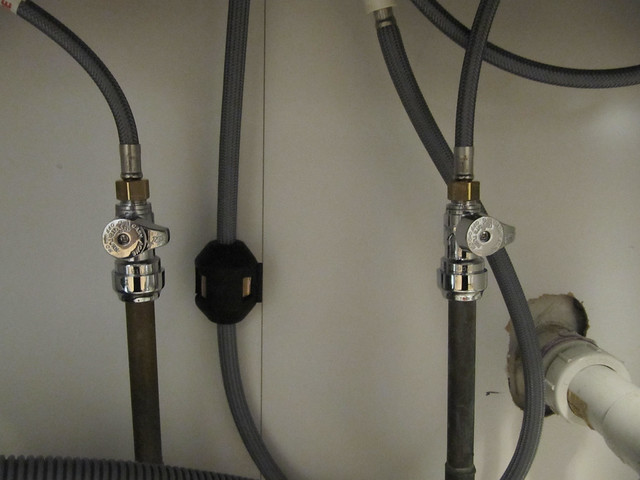
for the piece in front of the sink we just had to measure from that toe kick to the end of the sink cabinet and install that. easy peasy. if you look closely on under the peninsula cabinets (with the flashlight in it), you can see the screw we used to attach that toekick.
778


the dishwasher has a removable toekick panel and clearly states in the instructions NOT to cover it with any other toekick material. (or you block access to the plumbing and electrical and height/level adjustments). that toekick is black.
762

the last gap we had to work on was between the panel on the side of the dishwasher back to the dishwasher toekick.
764same type of little front to back gap as with the corner cabinet by the porch door.

so we screwed a block of wood to the side of the bottom of the inner mounting board, and cut a piece of toekick that went from the panel back alongside the dishwasher to the back wall, and just sort of propped it in place. it works. and its not like anyone will ever kick that piece since its behind the panel and to the side of the dishwasher toekick.
776


thursday/yesterday i went to ikea and returned the 3 extra toekick pieces and 4 glass drawer sides that were extra. then i bought a new deeper 24" wide drawer and the deeper glass drawer sides for that. picked up a piece of bodkin fancier trim to try above the cabinets. i picked up a 30x5 drawer front i'd like to try over the stove since it'll have finished edges. it'll need to be cut shorter, but the ends will be finished, and no scratches. i also picked up another utrusta metal shelf divider thing for the cabinet over the fridge. and 2 trash can lids for the times when the garbage or recycles stink. the trash really stinks right now and isnt even half full so the lid is good. and when the lids are not needed i can stick them down between the two trash cans that are narrower at the bottom than the top.

i need to finish the trim between the cabinets and the ceiling, and i will be done with ikea stuff. there are extra of the trim pieces i'd previously chosen that would need to be returned before the 365 days are up end of october. and i seem to be moving a lot slower. i just want to finish that and not have to worry about returns or exchanges.

otherwise there is still the backsplash to be decided. and i have no clue what i want.

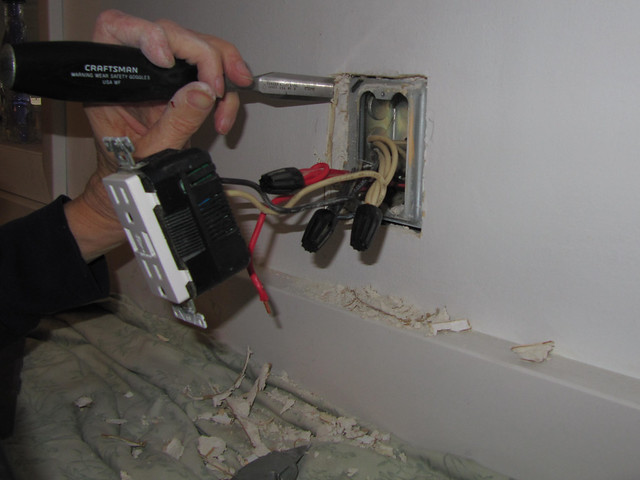
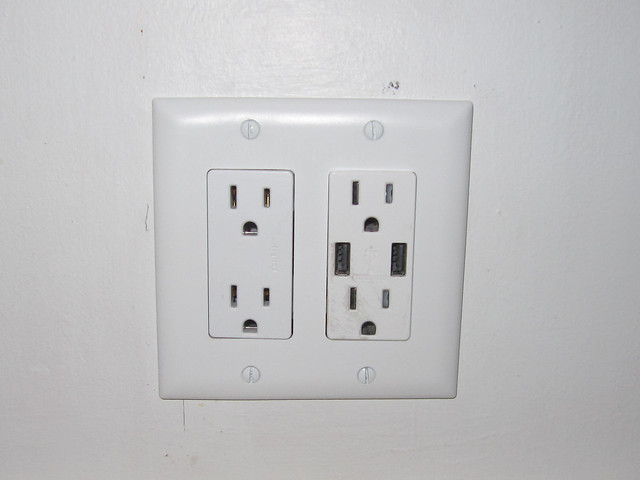
and there is one outlet i'd like to turn into a double outlet, which will require a new larger electrical box to fit two sets of outlets, and cutting into the sheetrock of the wall to remove the old box and install the new one. dad says we can do it. it'll require some sheetrock patching but i'm pretty good at that now and i have some leftover sheetrock.

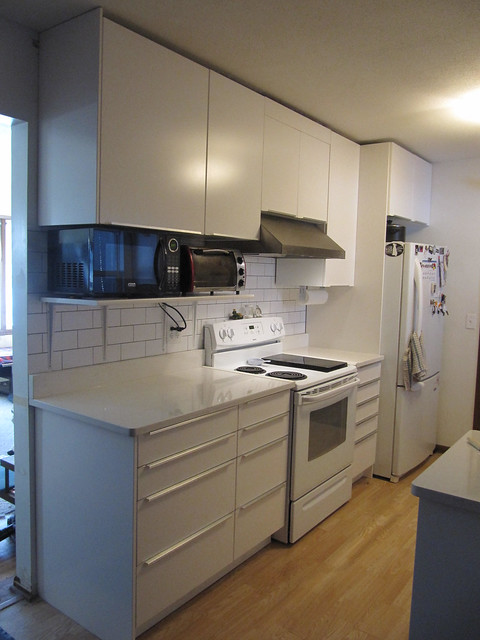
then the kitchen will be done! its been 10 months. i dont at all mind how long its taken to get this far. i really really REALLY appreciated being able to do this at our own pace. to be able to take our time to solve problems we ran into rather than having to hurry thru and half-ass something. and it helped that we finished one half before we started on the other so i always at least had half a kitchen. and we managed to jury-rig up the old kitchen sink on top of the new cabinets until the new counters and new sink got installed. so i only had a few days of having to do dishes in the bathroom.

Tuesday, August 27, 2019

kitchen update # 63 - window trim

dad came up and we whipped out the trim for the inside of the kitchen window.

the window before trim
766

the trim laid out on the kitchen table so we could nail the corners together before we put it in place. because of the cabinets and sink theres no way to nail the corners together once its in place.
767

the blue arrow shows the teeny little nail pounded partway in. we predrilled the hole with a smaller drillbit to help prevent fracturing the skinny trim.
768

we also glued the corners together
769

tada! window trim in place. you can see how there wouldnt have been room to reach the corners to nail.
770

i fucked up pounding one of the nails in and bent it over. i had to pull it out and try again. the second hole i drilled managed to line up exactly with a nail holding the sheetrock underneath to the studs in the wall behind it. so of course that nail wouldnt pound in at all. third times the charm, ugh. i dont know if wood filler will work on plastic/polystyrene trim. i went with this trim because its over the sink and will get splashed and i dont want it to rot. the new kitchen window is plastic/vinyl and wont rot either.
779

but the window trim is done! still needs caulking though.

Saturday, August 17, 2019

kitchen update # 62 - cutting the tall cabinet down

the old tall kitchen cabinet shown here was one solid piece. unfortunately it was 2 inches (5cm) too tall for the basement ceiling, even after the decorative trim on top was removed.
10-25-2018   (146)

i cut the top half off from the bottom half with the oscillating tool by cutting along the flat top of the bottom section in the microwave hole. that way i got a nice straight edge.
756
(and all those boxes in the background FINALLY made it into the recycling bin now that the bazillions of cabinet boxes are all gone)

this lower half of the cupboard has a normal bottom with the recessed toe-kick (ignore the dirt from sitting out in the garage for the better part of a year)
757
758

here is the top half, turned upside down, needing the microwave-hole-sides cut off. but not cut ALL the way off or it'd be too short to fit next to the other base cabinets.
754

dad came out with his skilsaw and we measured and marked and cut most of those microwave-space-sides off. dad could get the straight line with his saw that i couldnt get with mine.
750

here is the top half all cut down. we'll make some more minor cuts on the bottom so it can have a proper toe-kick like the other cabinets.
749
and i'll take off the doors and flip them around so the handles are on top instead of the bottom. i already measured and the hinges are perfectly equal so it'll be an easy switch.

the top side of this top-half of the tall cabinet isnt nice and smooth. the decorative trim on the top, some of the screws were glued in and would not unscrew. dad had to pound it off.
751

another challenge is this cabinet (top half and bottom half) has no back. all the other cabinets had backs. so we'll have to cut something up to fit. eventually.
752

these cabinets will be repurposed into a better kitchen for the roommate in the basement, but after all the work we did, we're taking some time off before starting that project.

Wednesday, August 14, 2019

kitchen update # 61 - day after the countertops

on august 7 i had the roommate shut off the main water to the house so i could replace the shut off valves under the sink. (the shut off valve is down in his bathroom).

installing the new faucet
722

new faucet with the pull-down sprayer head in place
723

lots of hoses, all fit thru one hole in the countertop
725

underneath
724

the old shut off valves, the one on the left (hot water) leaks and has a paper towel shoved in it.
726

then i used dads pipe cutter and cut off the old leaking shut off valves
727

dads pipe cutter (the red thing). you twist the dial on the side to tighten the cutter wheel and spin it around the pipe, then tighten, then spin, and keep doing it until the pipe breaks off.
732

733

the orange thing has two functions. one is those little black circles in the middle are metal cutters that strip any burrs off the top of the pipe after the pipe has been cut off. you spin it around while pressing down. the second function is that it tells you the proper depth for the push-to-fit valve to be pushed down to.
728

you draw a line under it, then push and push and push the valve all the way down so its properly in place.
729

voila! valve pressed down to the line, perfect fit. no soldering.
730

then i attached the hoses from the faucet to the new shut off valves
731

lovely functional shut off valves under the kitchen sink, and they work nice. then i had the roommate turn the water back on and no leaks.
734

then i needed to make a run to the store for more plumbing parts because the sink drains are in different spots than the old ones, so the old drain pipe pieces didnt work. i put a bowl in the sink under the faucet to remind me theres no drain hooked up yet even though the water is hooked up.

on august 8 i went to menards and found all the new plumbing parts i needed in one set.
744

i attached the little stubs to the sink strainer, then screwed the sink strainer in with the plumbers putty.
741

view from above with the new sink strainer in place
742

all the plumbing drain pieces cut and screwed together! no leaks!
746

kitchen with the sink cabinet doors in place now that i'm done with all the plumbing underneath.
737

the new faucet is great, but at first kept dripping a few times each time i shut it off. i worried if thats just how the pull-down sprayer faucets work or if i didnt something wrong. but it quit doing that.

every time i walk into or out of the kitchen i drag my hands over the new pretty counters.