Tuesday, December 18, 2018

kitchen post 27 - returns/exchanges/handles - starting to really dislike ikea

I went to their store to return some items and exchange some items. well they don't do exchanges. just return it and go buy a new one. never mind that I paid the sale price, and if I go buy it new again now, I don't get the sale price. I had to get a manager to come talk to me. he said that I could go buy it, and while I was waiting for the order to be picked, I could come to them and they'd refund me the difference in sales price. *sigh*. so I returned the two incorrect kitchen island pieces, the 6 drawer fronts the sent me in duplicate, and extra set of drawer side add-ons, and 11 pairs of handles. got $196 on a store credit.

headed upstairs to the kitchen department to have them order the two correct kitchen island pieces, and two replacement drawer fronts that I managed to scratch up. so i waited while they ordered those parts and printed out the paper for me to pay downstairs. but first I had to go upstairs and wait in the kitchen section for an employee to be able to reorder these parts for me.

i chose to return the little 2" wide blankett handles for all the drawers and go for the ones that go the full width of the drawers. the 2" wide ones were just too little. headed over to the handles and picked up the 36" long one for the undersink drawer, three 30" long ones for drawers, three 24" long ones, and was baffled to find zero 18" ones. i checked the stock of everything on their website before i left the house. their website said they had over 20 in stock. so I went back to the kitchen department and asked them to help me find them. they checked their computer and it said they had 27 in stock, so I was right about it saying it was definitely in stock. but they couldn't find any either. he went off somewhere else to check, came back and said he couldn't find them there either. so he ordered four of the 18" handles to be shipped to me with free shipping since their stock was off by so much. but I had to wait for him to do that order, and print me out that paper to pay downstairs since i had to pay for the handles too.

heres a picture of the full width handles on the drawers. much better than the little 2" ones.
.20181220_163935

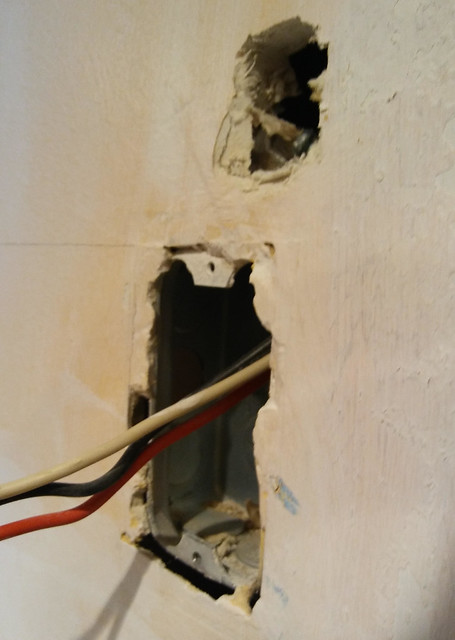
I asked about the little plastic nub/tabs for the corners of the cupboard doors, and they said they don't sell those, but any home improvement store does. well yeah, I already looked, but what those stores offer doesn't match the thickness of the ikea ones. *sigh*.

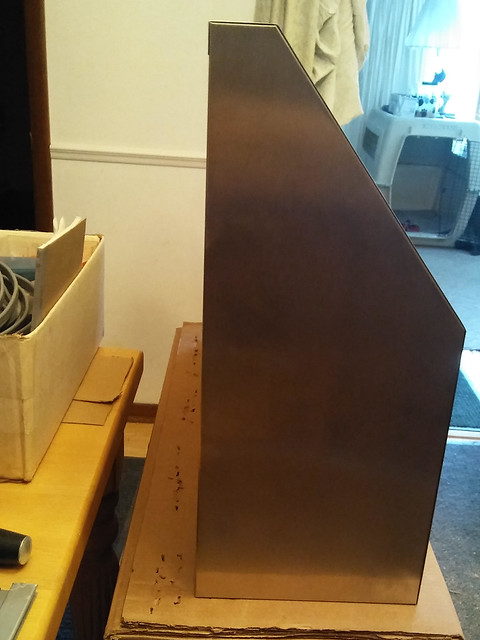
I checked out the floor display of an undersink cabinet drawer front to see how those panels are attached for my own knowledge before assembling mine.

In their kitchen display area i saw that they used the longer width handles on the upper cabinet doors as well as the drawer fronts. so now i'm rethinking if I want to keep the smaller ones on the upper cabinets or not. I mean, I already opened a bunch of them so I don't know if I can return them. and the longer handles are much more expensive than the little ones. I don't know. must think for a while.

then I went downstairs to pay and waited in a very long line. then the guy ahead of me had trouble paying because their credit card reader went down. he was able to pay in cash. then the guy rang me up for the handles and my two papers of orders and used my store credit to pay for it, leaving me with $30 to pay. I tried to pay with my credit card, but the machine wouldn't work again. he rebooted everything (and it took FOREVER! like ten minutes for the register to reboot, not even exaggerating). then tried to pay again and it wouldn't let him. he placed multiple calls to ask for a manager and ask for additional cashiers and ask to be moved to a different register because his card reader was down. according to the cashier this happens a lot. the Saturday after thanksgiving he said all the credit card readers in the whole store went down and stayed down. people could only pay by cash or they couldn't buy anything. we waited some more for a manager to come and he tried to void the transaction so I could go to another checkout and it wouldn't let him do that either. he rang up about 5 different people who could pay cash while i waited for the manager. eventually he went and told everyone in line they had to go to another register. after 20-30 minutes of waiting, a manager finally came down and voided the transaction. she took me over to another register and re-rang everything up, but rang one item up 3 times when there was only one of them, so I had to argue that the price was wrong. she finally got that sorted out and gave me a $15 credit for having to wait. which left only $15 to pay. then i finally got away from the checkout area.

went back to the returns area to get my sales price discount on the ordered items, and my number was quite a ways out so I had lots more waiting. they managed to pull my order and I picked that up and signed for it and still had to go wait longer for the returns area to call my number. they refunded the difference onto my credit card for the sale price.

but by then it was 3:30 and rush hour was starting and my patience was gone. I drove from ikea to mom and dads and stopped in to drop off the panel piece for dad, so he can cut the piece out for over the stove, only to find he was out in the garage cutting my shelf piece a tad bit shorter to fit. so we went ahead and cut the piece for over the stove right then and there. I pilfered a bottle of water from moms supply because I was out of water in my car and it was now 4:30 and I had to drive thru more rush hour to get home.

i'm pooped. its been a long frustrating day.

pictures of the little 2" handles on the upper cabinets

mount the handles close?
.20181212_131140

or a little farther apart? (i used painters tape to test out different ideas)
.20181212_131305

should i mount them horizonally? or vertically?
.20181213_090736

the back side view of the handles
.20181213_090745

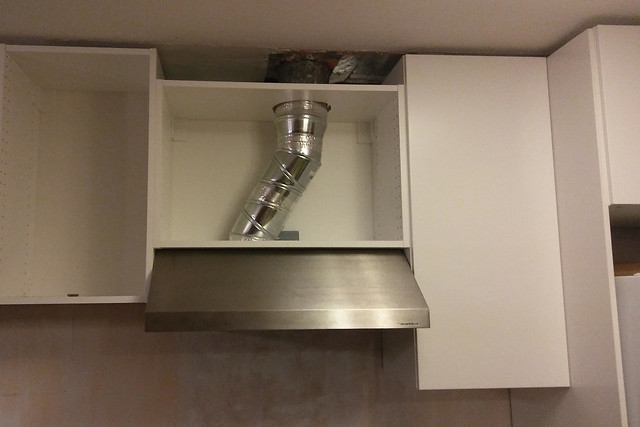
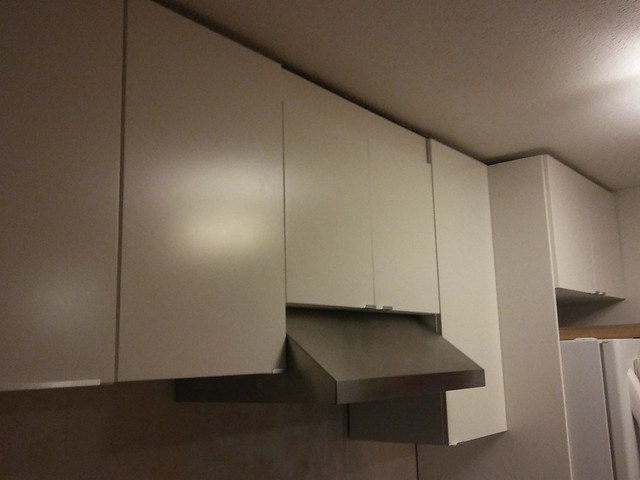
view of the uppers with the little handles, and the cut panel piece above the stove cabinet to fill in the empty space.
.20181220_163909

the handles are sold in two-packs. i had to buy two of the two-packs for the drawers below. leaving me with and extra 24" handle. so i tried it out on the cabinet up above.
.20181220_163946

i think i like the full width handles for the upper cabinets too. this will require another trip to ikea at some point.
.20181220_163940_Burst01

Sunday, December 16, 2018

kitchen post 26 - moving the kitchen outlet

dad brought up temporary counter pieces for me so I could have counters on that side of the kitchen since we'll be taking apart the other side of the kitchen next. he cut and glued a couple generic white shelf pieces together to make it work. they're great. fits well.
.20181216_140414_Burst01

we took advantage of it right away
.20181216_140423

we tried to move the outlet behind the stove but discovered that particular wire is inside metal conduit on an inner wall! where metal conduit is unnecessary. *sigh*. to access that piece of conduit and move it would be a big mess and pain in the ass and involve cutting away and replacing a LOT more sheetrock. so we'll leave that box there. then we cut a hole against the stud to the left.
.20181216_135229_Burst01

the hole where we discovered conduit, above the old electrical box was our attempt to discover if the wire came in from above or below.
.20181216_135240

the duck tape on the countertop is from where dad glued the pieces together earlier in the week. after we were finished today we removed it. its held up quite well.
.20181216_140423-1

old wires above, with the wire nuts capping them, new wires down below, going from this box over to the left to the new box.
.20181216_145956
(the ground wire is already screwed to the back of the metal box).

it took a while for dad to strip all the outer coating from the group of wires.
the wire 'cable' contains three wires. black, white, and ground. thanks to alternating current, black is hot, white is not/return, ground is obviously ground. there is the thick outer insulation coating enclosing all three wires. a thin layer of brown paper insulation, and the three inner wires. black and white are enclosed in black and white insulation, and the ground is in another layer of brown paper insulation. all that insulation has to be stripped back to expose the bare wires for contact with the outlet, and the live wires in the old outlet.
indoorelectricalwire
in our case there's a fourth wire, a red one. because all my kitchen outlets are split-wired to two circuit breakers.

we mounted the new box, wired it to the old box with a new strip of wire. we also changed it from two outlets to four, since the microwave and toaster oven are going to be sitting on a shelf above this outlet, and i'd still like to be able to plug additional things in.
.20181216_150144

but now its all wired up and I have outlets on that side of the kitchen again. yay! its all pretty with its new cover plate on
.20181216_150251

we slapped a flat cover over the old box. and i'll patch the hole.
.20181216_151319

almost all pretty
.20181216_151324

see why we had to move the outlet? the old one is behind the stove because we moved the stove over 3" to allow me to widen the counter between the fridge and the stove from 15" to 18".
.20181217_113213
(hole patched)

see my pretty first half of the kitchen now with temporary shelf/countertops
.20181217_113400_Burst01

next up, I need to decide how wide I want dad to cut the shelf I bought for the microwave and toaster oven. and I need to measure the piece of paneling for over the stove to fill in that gap above that cabinet.

I also need to figure out how i'm mounting that shelf, because the stud on one end is farther out that the upper or lower cabinets and the shelf would stick out funny. there are two studs for the shelf to be mounted to, which should hold it. I think. but I bought three brackets just in case. I could use wall anchors for the one end that'll have the heavier microwave on it. dad doesn't think much of wall anchors. I do. but I don't know. I worry about the weight of the microwave. I'll figure it out, I need to think more.

Sunday, December 9, 2018

kitchen post 25 - exhaust vent is in!

dad came up around 11 and didn't leave til 5. i'm pooped. we discussed how high or low to hang the rail and figured out where the bottom of the cabinet would be in relation to the venthood. then figured the distance from the existing rail to the bottom of the cabinet on the left (30" tall instead of 20" tall.) since the rail sits down below the top of the cabinet, you cant just measure from that to 20" down when trying to locate where to install the rail. so using the existing rail and existing cabinet already mounted on the wall, we cheated. we marked off screw holes for the new lower rail that is just for that one cabinet over the stove, leveled it off, screwed it in. done with the rail.

onto the cabinet! we used a piece of cardboard cut the same size as the top of that cabinet to mark where the vent pipe stuck down from the ceiling, and added a bit extra to account for having to lift the cabinet up around the pipe in front of the rail, and then move the cabinet back and down onto the rail. i cut the hole out of the cardboard piece and we marked it on the top of the cabinet and dad cut with his jigsaw. we did really good with that cut. put it up, tested it, the hole was perfectly located and allowed for mounting it, and the vent pipe fit great.
217

took the cabinet down and flipped it over to mark the bottom of the cabinet for the hole for the vent hood to connect to. that cut took 3 tries because the template they gave was a bad template! we later tried the template against the actual vent hood part and it didn't even fit! their template too small. so we made that hole larger and tried again, only to then discover that their instructions to line the edge of the template up with the center line of the cabinet was off by 3/16"! so the template AND the measurement they said to use were both bad. our marks were correct and centered, as per their instructions. so then we had to recut it another 3/16" over towards center. we should have just measured ourselves and screw their darn template. (the template to mark out the hole was not like some templates that are the size of the whole item with the hole properly located in it and you just line up the outside edges and mark the hole. this template was ONLY the size of the hole.) but we got both holes cut.

here is the template held up to the metal flange that sticks up thru the bottom of the cupboard. you cant even see the metal flange because the template is too small and covers it up.
216

216

hole in the bottom of the cabinet
219

some of the pieces we cut off making the hole larger
220

then we put the cabinet up and marked off where to reroute the outlet wire for the vent hood. we drilled a hole thru the back of the cabinet and the sheetrock behind it.
221

took the cabinet down and fished the wires from the old hole over to the new little hole.
old hole
222

out the new hole
223

started patching the old hole
224
226

another picture showing the cardboard cutout for the vent pipe on the top of the cabinet (after we'd finished cutting the bottom hole)
225

another picture showing the vent hood hole on the bottom of the cabinet
227

the hole on top of the cabinet showing the vent pipe from the ceiling sticking down
229

next we lined up the fronts of the cabinets and screwed them together thru their sides. we had to work hard to get the front of this cabinet to line up with the cabinets on either side of it because apparently the wall 3-4" down from the ceiling doesn't stick out as far, so this cabinet didn't stick out as far either. with some pushing and grunting we got them properly lined up, clamped together and then screwed together. so all upper cabinets were in, and all firmly in place.
228

the cabinet all the way on the left end needs shimming on the bottom as it doesn't touch the wall, but with the hump in the wall we figured that might happen.
first cabinet/wall gap
244

second smaller gap
245

first gap shimmed
249

view from the bottom of the first shim
251

second slightly smaller shim
252

picture showing first shim, second shim, and the other two cabinet bottoms flush against the wall not needing shims
250

I think this is when we went for lunch, and ran to menards to pick up some electrical and vent parts:
-a new electric outlet box, only half deep, to mount on the inside of the cabinet rather than on the wall behind the cabinet
-a cover piece for that box
-an adaptor piece going from 7" pipe in the ceiling down to the 6" size pipe on the vent hood
-two angled pieces that adjust to fit multiple different angles
-an inside-to-inside piece to mate the two 7" 'outside' pipes together. except they didn't have one in 7". only 6 or 8.

so dad took the 8" inside to inside piece and cut the riveted/joining section out, overlapped the ends and squeezed the together. then we taped it together to make it fit the 7" pipe end, and the 7" end of the adaptor taking it from 7" to 6".
232
230

the inside-to-inside mating piece installed into the vent coming down from the ceiling inside the cabinet
233

left is the 7" to 6" adaptor piece. right is the adjustable angle piece.
231
the right piece we actually had two of. they're 6" wide. they swiveled to make various angles. each one of those was actually made of 4 swiveling sections. we turned only one section on each piece to angle over and meet up with the vent hood. if you turned all 4 pieces it made 90` angle.

fitting the adaptor piece and the two angle pieces in was tricky. the ceiling pipe was off to the right, the vent hood was off to the left, only 3 inches off from each other. which doesnt seem like much at all, but sure makes a difference with those vent pieces! i would have liked to have moved the stove over even more to have more space between the fridge and stove than the old kitchens 15" that we changed to 18" in this new kitchen. but dad said we'd have to move the vent pipe up thru the attic if we moved it any more than that. and after all this, i can see why.

the pipe pieces were all just a little bit too tall, so dad had to cut strips off each end of everything to shorten it up enough to make it fit. lots of cutting with the tin snips, lots of sharp edges and burrs. fitting these three pieces together took a lot of fiddling.
dad cutting off a bit of metal off the adaptor piece
234

dad also had to cut off the angle pieces. cutting metal like this is dangerous because the metal is EXTREMELY sharp and can cut you without any effort at all.
237

taping all these pieces together got challenging at the top and bottom, because even though the pipe and the vent hood flange stuck into the cabinet, they only just BARELY stuck in, even with the bottom side of the top piece, and top side of the bottom piece. so they didnt stick THRU the cabinet. i ended up having to cut short pieces of tape and stick them down between the cut hole in the cabinet and the upper vent pipe and same with the lower vent flange. so taping was extra fiddly as well. if we hadnt screwed the cabinet in place, we could have lowered it back down and taped in the inside-to-inside mating piece and the 7" to 6" adaptor piece, and lifted the cabinet up into place. i'm not sure we could have taped the angle piece to the vent hood flange before attaching it up to the bottom of the cabinet. those angle pieces had to be rotated just right to fit, and wouldnt have pushed up thru the bottom at an angle.

vent hood standing up, awaiting installation
235

underside of the vent hood
236

dad decided to not use the wood screws the vent hood came with to attach it. but rather he bought taller bolts and nuts and washers, and drilled a hole thru the bottom of the cabinet to attach the vent hood.
238

so we got the vent hood up, its pipe hole lined up and connected with the vent piping, pulled its wires up and thru, and pushed the bolts in. they were just barely tall enough and took more fiddling to get them in. and during that time I didn't notice the vent wires got a little pinched, so we had to loosen everything up, move the wires back to where they were supposed to be, and screw it all back in place again. oops.

we drilled a couple extra holes in the electrical box. one thru the center of the back to pass the electric wires into the box. and one smaller one thru the back to screw the box to the back of the cabinet/drywall. then dad ran the vent hood wires into the box thru a hole on the end.
239
(you can kind of see the difficulty in taping at the very bottom of the cabinet that i mentioned)

he did some trimming and striping and attached the wire from the wall to the vent hood.
240

tucked it all inside the half deep box, and put the cover on the box. turned on the light and the fan and it all worked!
241

Heidi and puppy ended up put in their crates for the last few hours because Heidi kept trying to lick up all the sawdust.

dad went home and i cleaned up and vacuumed up all our sawdust mess from cutting the holes. i'm dead. my feet hurt SO bad.

here is a close up of all the vent pieces
242

the cabinet and the new vent hood. you can see we lowered the cabinet from the ceiling compared to the other cabinets to get the vent hood at the proper manufacturer recommended distance from the stovetop.
243

tada! the first half of my kitchen!
246

uppers
247


isnt it awesome!!?!
248