onto the cabinet! we used a piece of cardboard cut the same size as the top of that cabinet to mark where the vent pipe stuck down from the ceiling, and added a bit extra to account for having to lift the cabinet up around the pipe in front of the rail, and then move the cabinet back and down onto the rail. i cut the hole out of the cardboard piece and we marked it on the top of the cabinet and dad cut with his jigsaw. we did really good with that cut. put it up, tested it, the hole was perfectly located and allowed for mounting it, and the vent pipe fit great.

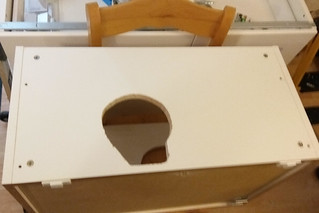
took the cabinet down and flipped it over to mark the bottom of the cabinet for the hole for the vent hood to connect to. that cut took 3 tries because the template they gave was a bad template! we later tried the template against the actual vent hood part and it didn't even fit! their template too small. so we made that hole larger and tried again, only to then discover that their instructions to line the edge of the template up with the center line of the cabinet was off by 3/16"! so the template AND the measurement they said to use were both bad. our marks were correct and centered, as per their instructions. so then we had to recut it another 3/16" over towards center. we should have just measured ourselves and screw their darn template. (the template to mark out the hole was not like some templates that are the size of the whole item with the hole properly located in it and you just line up the outside edges and mark the hole. this template was ONLY the size of the hole.) but we got both holes cut.
here is the template held up to the metal flange that sticks up thru the bottom of the cupboard. you cant even see the metal flange because the template is too small and covers it up.


hole in the bottom of the cabinet
some of the pieces we cut off making the hole larger

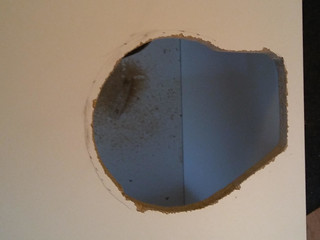
then we put the cabinet up and marked off where to reroute the outlet wire for the vent hood. we drilled a hole thru the back of the cabinet and the sheetrock behind it.

took the cabinet down and fished the wires from the old hole over to the new little hole.
old hole

out the new hole

started patching the old hole


another picture showing the cardboard cutout for the vent pipe on the top of the cabinet (after we'd finished cutting the bottom hole)

another picture showing the vent hood hole on the bottom of the cabinet
the hole on top of the cabinet showing the vent pipe from the ceiling sticking down

next we lined up the fronts of the cabinets and screwed them together thru their sides. we had to work hard to get the front of this cabinet to line up with the cabinets on either side of it because apparently the wall 3-4" down from the ceiling doesn't stick out as far, so this cabinet didn't stick out as far either. with some pushing and grunting we got them properly lined up, clamped together and then screwed together. so all upper cabinets were in, and all firmly in place.

the cabinet all the way on the left end needs shimming on the bottom as it doesn't touch the wall, but with the hump in the wall we figured that might happen.
first cabinet/wall gap

second smaller gap

first gap shimmed

view from the bottom of the first shim

second slightly smaller shim

picture showing first shim, second shim, and the other two cabinet bottoms flush against the wall not needing shims

I think this is when we went for lunch, and ran to menards to pick up some electrical and vent parts:
-a new electric outlet box, only half deep, to mount on the inside of the cabinet rather than on the wall behind the cabinet
-a cover piece for that box
-an adaptor piece going from 7" pipe in the ceiling down to the 6" size pipe on the vent hood
-two angled pieces that adjust to fit multiple different angles
-an inside-to-inside piece to mate the two 7" 'outside' pipes together. except they didn't have one in 7". only 6 or 8.
so dad took the 8" inside to inside piece and cut the riveted/joining section out, overlapped the ends and squeezed the together. then we taped it together to make it fit the 7" pipe end, and the 7" end of the adaptor taking it from 7" to 6".


the inside-to-inside mating piece installed into the vent coming down from the ceiling inside the cabinet

left is the 7" to 6" adaptor piece. right is the adjustable angle piece.

the right piece we actually had two of. they're 6" wide. they swiveled to make various angles. each one of those was actually made of 4 swiveling sections. we turned only one section on each piece to angle over and meet up with the vent hood. if you turned all 4 pieces it made 90` angle.
fitting the adaptor piece and the two angle pieces in was tricky. the ceiling pipe was off to the right, the vent hood was off to the left, only 3 inches off from each other. which doesnt seem like much at all, but sure makes a difference with those vent pieces! i would have liked to have moved the stove over even more to have more space between the fridge and stove than the old kitchens 15" that we changed to 18" in this new kitchen. but dad said we'd have to move the vent pipe up thru the attic if we moved it any more than that. and after all this, i can see why.
the pipe pieces were all just a little bit too tall, so dad had to cut strips off each end of everything to shorten it up enough to make it fit. lots of cutting with the tin snips, lots of sharp edges and burrs. fitting these three pieces together took a lot of fiddling.
dad cutting off a bit of metal off the adaptor piece

dad also had to cut off the angle pieces. cutting metal like this is dangerous because the metal is EXTREMELY sharp and can cut you without any effort at all.

taping all these pieces together got challenging at the top and bottom, because even though the pipe and the vent hood flange stuck into the cabinet, they only just BARELY stuck in, even with the bottom side of the top piece, and top side of the bottom piece. so they didnt stick THRU the cabinet. i ended up having to cut short pieces of tape and stick them down between the cut hole in the cabinet and the upper vent pipe and same with the lower vent flange. so taping was extra fiddly as well. if we hadnt screwed the cabinet in place, we could have lowered it back down and taped in the inside-to-inside mating piece and the 7" to 6" adaptor piece, and lifted the cabinet up into place. i'm not sure we could have taped the angle piece to the vent hood flange before attaching it up to the bottom of the cabinet. those angle pieces had to be rotated just right to fit, and wouldnt have pushed up thru the bottom at an angle.
vent hood standing up, awaiting installation
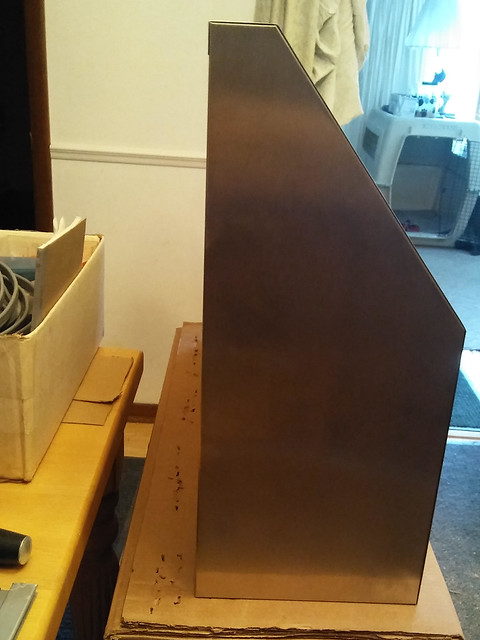
underside of the vent hood

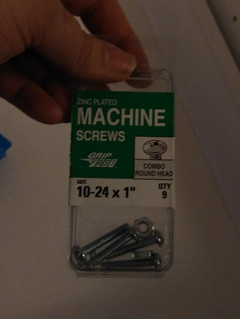
dad decided to not use the wood screws the vent hood came with to attach it. but rather he bought taller bolts and nuts and washers, and drilled a hole thru the bottom of the cabinet to attach the vent hood.
so we got the vent hood up, its pipe hole lined up and connected with the vent piping, pulled its wires up and thru, and pushed the bolts in. they were just barely tall enough and took more fiddling to get them in. and during that time I didn't notice the vent wires got a little pinched, so we had to loosen everything up, move the wires back to where they were supposed to be, and screw it all back in place again. oops.
we drilled a couple extra holes in the electrical box. one thru the center of the back to pass the electric wires into the box. and one smaller one thru the back to screw the box to the back of the cabinet/drywall. then dad ran the vent hood wires into the box thru a hole on the end.

(you can kind of see the difficulty in taping at the very bottom of the cabinet that i mentioned)
he did some trimming and striping and attached the wire from the wall to the vent hood.

tucked it all inside the half deep box, and put the cover on the box. turned on the light and the fan and it all worked!

Heidi and puppy ended up put in their crates for the last few hours because Heidi kept trying to lick up all the sawdust.
dad went home and i cleaned up and vacuumed up all our sawdust mess from cutting the holes. i'm dead. my feet hurt SO bad.
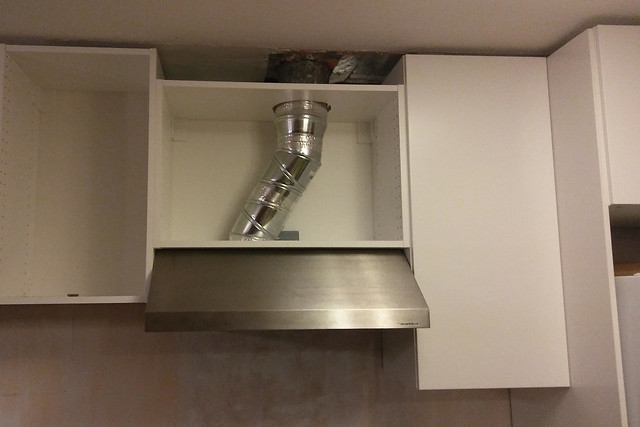
here is a close up of all the vent pieces

the cabinet and the new vent hood. you can see we lowered the cabinet from the ceiling compared to the other cabinets to get the vent hood at the proper manufacturer recommended distance from the stovetop.
tada! the first half of my kitchen!

uppers

isnt it awesome!!?!

No comments:
Post a Comment