Wednesday, May 22, 2019

kitchen update # 49 - the peninsula cabinets

today dad came up and we figured out the peninsula cabinets.

i was able to tilt the cabinets on their back and put the legs on, but i needed dads assistance to get them standing upright without breaking the legs
533

yesterday i cut the backer board parts and screwed them in place on the back of the 18" and 12" peninsula cabinets for the cover panels to mount onto. and i got them properly located and leveled. (the boards across the back at the top and the bottom)
558

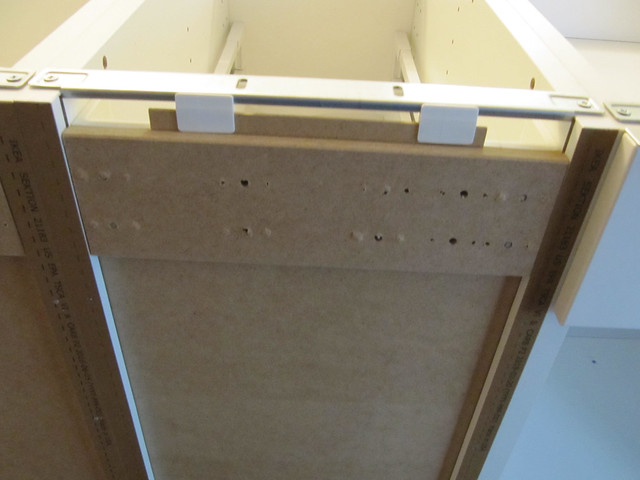
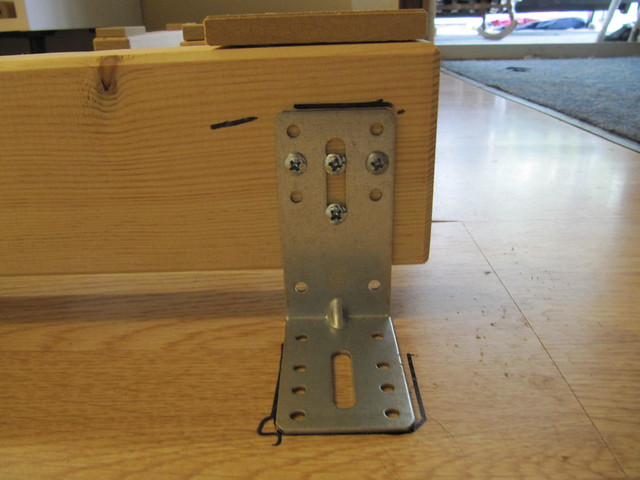
the backer boards came with special inside corner brackets to help mount them
546

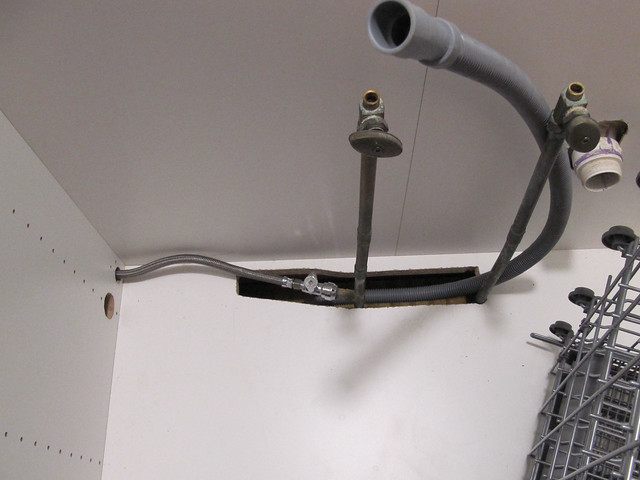
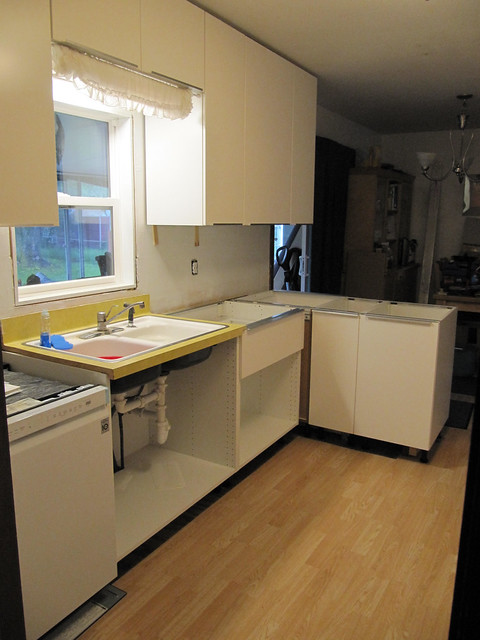
close up, you can see that the thin pressed board back panels sit in a groove, recessed from the back edge of the sides of the cabinet. the backer boards provide a surface flush with the back edge of the sides so theres something to screw the cover panels into.
559

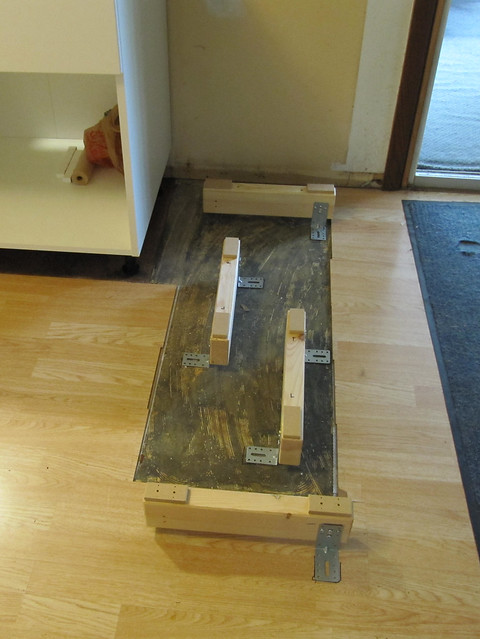
today we put together the peninsula mounting blocks that attach to the floor, that the cabinets screw down onto. there was a little trouble because they werent tall enough! but the backer board parts from yesterday had extra sections so i cut them up and we glued them on top of the mounting blocks and then were able to adjust the height right so they came up to the bottoms of the cabinets.
535

we used a marker and marked where they were on the floor.
536

they came with screws to mount the brackets onto the wood blocks, and to screw the cabinets to the blocks. but they didn't come with any screws to screw the brackets to the floor, so dad brought up some appropriate sized screws.
537

it took a bit of fiddling to get the blocks to the right height and get the adjustable screw screwed tightly enough to KEEP the right height. and this fiddling was done with me on my belly adjusting the blocks up and down so they reach the bottom of the cabinets.


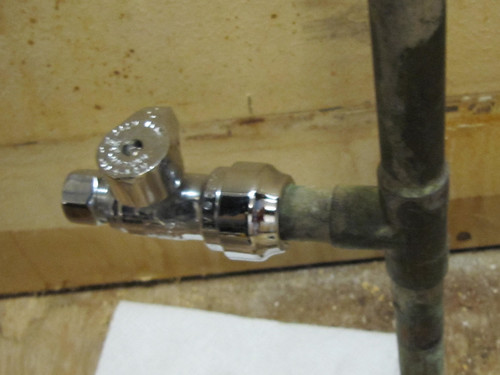
then we took a break for lunch and stopped at menards and picked up a couple new pvc plumbing pipes for under the kitchen sink because one of the drain pipes wouldnt connect properly. dad took it apart and said the seal had gotten deformed.

back at home we lifted out the three peninsula cabinets so i could screw the permanent screws into the brackets, and screw the peninsula mounting blocks into the floor. and to glue the extra height pieces onto the top.
538
while i did that, dad fixed my drain pipe under the sink.

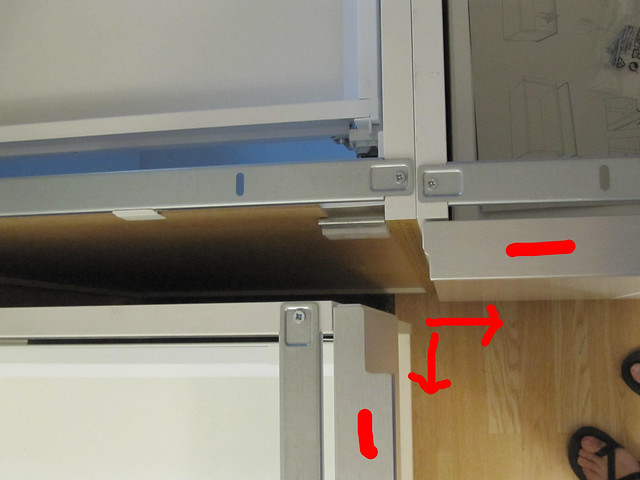
then we lifted the cabinets back into place, got them properly located again, and leveled out again. this took a bit of fiddling, getting everything right for that inner corner so the drawers could all open unimpeded, so that their handles wont catch on each other.
553

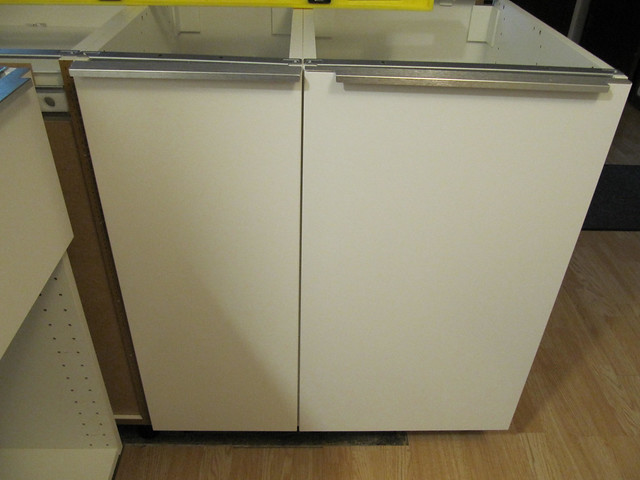
we screwed the cabinets together so they're one solid unit
542
543

and screwed them to the floor
544
545
540

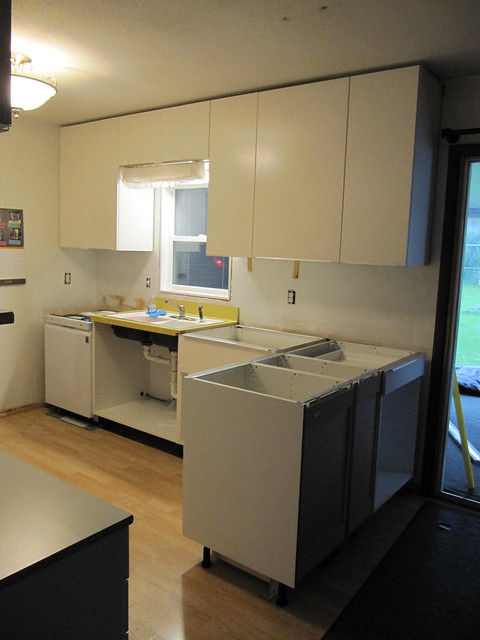
and with that, the cabinets are all in!
555

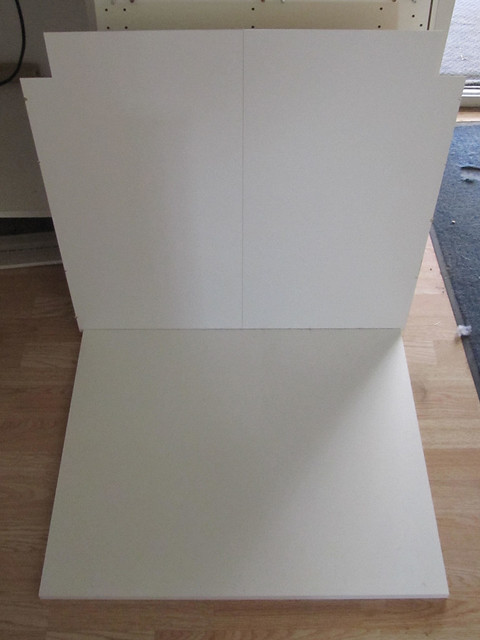
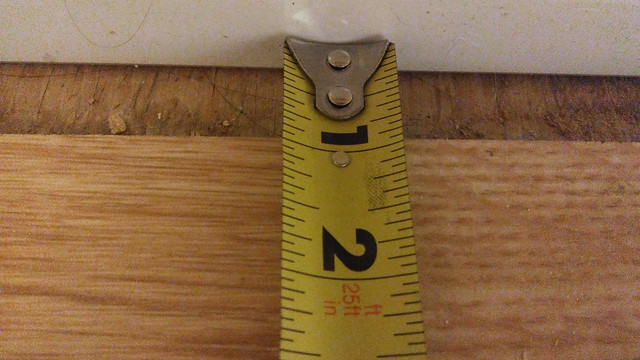
then we took out one of the 4 cover panels for the base cabinets and held it up in various places. we measured and made up a list of the different sizes needed for the different places. dad took the list and the panels home to cut on his table saw and will be back on saturday to hopefully install them, assuming all our measurements are correct.

552

ALL THE CABINETS ARE IN!!! woohoo!!!!!
551

Monday, May 20, 2019

kitchen update # 48 - another trip to ikea

so my last trip, last monday, i picked up a 12" and 18" base cabinets to replace the 30" one i returned, along with the pull out drawer for under the sink that wouldnt work because of plumbing. the 18" cabinet is the pull out trash/recycle cabinet, because the whole point of hte under sink pull out drawer was to have the trash and recycle bins tucked away, out of reach from the dogs. and if i couldnt have them under the sink, i needed them somewhere else.

with the 12" cabinet i had also picked up a pull out insert because its 24" deep and only 12" wide and i didnt want to be down on hands and knees trying to reach in all the way to the back. the individual drawers like all my other base cabinets have dont come in the narrower 12" size, the smallest is 15". so instead of drawers, it has a door that is attached to two shelf/drawers and the whole thing pulls out, top and bottom drawer/shelves together.

except the box was dented.
516

517

i opened it up and inspected the panel at my car in the parking lot as i loaded all the other boxes. the panel looked fine, so i kept it. i shouldnt have. when i got home and started taking pieces out to assemble it, the drawer slides were bent.
514

thats THICK metal. i cant even imagine what had to happen to that box to bend metal that heavy duty. so it had to go back.
512
511

but i need that drawer assembled and in place to properly locate the cabinets for the peninsula so the drawers and drawer handles on that inner corner can all open freely. if the cabinets are too close together they wont be able to open past each other. so i had to go back to the store again before we could proceed with the kitchen.

this morning i went and made decent time on the highway, 45 minute drive after rush hour had passed. spent a half hour in the store waiting. when the girl saw the bend up drawer slides her jaw dropped. i told her i didnt know what happened to manage to bend them, but i wanted a whole new box rather than just replacing those two parts because who knows what else was messed up. she fully agreed, placed a new order for that part, and sent me over to the furniture pick-up on the other wall from where they were.

now on a much earlier trip to ikea, one of the return people told me they didnt do exchanges! they ONLY returned stuff. they made me go up to the kitchen department and reorder the part. this girl did it all right there at the return counter, no hassle, no sending me up thru the entire store and wasting my time. so this girl gets the gold star. after 30 minutes i was back in my car driving another 45 minutes home. so two hours out of my life to exchange one item.

the 12" and the 18" cabinets assembled (to replace the 30" that was there)
518

the drawer for trash and recycles
519

both drawers in
520

anyway, i assembled it and installed it and its great.
the skinny 12" cabinet pull out drawer
523

although i had a hiccup because theres only two drawer slides. and two shelves. i looked at the instructions, and the next page, and screwed in both drawer slides on the bottom. then was perplexed about where the other set of drawer slides was for the upper drawer. it took paging back and forth between those pages a number of times before i realized only ONE went on the bottom. the other went up on the opposite side for the upper drawer. its a little odd but it works fine.
528

next up, i had to cut a 15" handle down to 12" to fit because they dont make 12" handles.
524

525

i used the dremel to cut it down, and then filed the edges smooth
529

you can see the cut off handle on the left doesnt have the same spacing as the one on the right. but when the countertop is on nobody will be able to tell.
550

then we can deal with the peninsula cabinets and mounting them to the floor. i think thats going to be complicated.

Monday, May 13, 2019

kitchen update # 47 - dishwasher and sink

i drove to ikea yesterday morning and returned a whole bunch of stuff:

-the 30" wide peninsula cabinet
-all its drawers and drawer fronts and handles
-the drawer for under the kitchen sink with its attached drawer front and handle
-24x40 door that had a dent in it
-5 cover panels for the back and end of that 30" cabinet that didnt reach to the floor the way i wanted

once i was in the parking lot of ikea, i reassembled the 30" cabinet i'd had to disassemble to fit into my car. then pushed in two carts of stuff to the return department. happily, i managed to convince the guy to put the returns on my credit card rather than store credit.

i could not find any trash cans that would fit in a 15" wide trash/recycle pull out cabinet. the width inside that cabinet was only 13.5 inches and the drawer was even narrower than that. so i went with the 18" cabinet. it can fit two 15" wide trash cans. and that ikea trash can fits a paper bag for recycles.

then i went upstairs to the kitchen department and ordered the two new base cabinets to take the place of the 30" cabinet. the 18" with the pull out trash/recycle, and a 12" with a cabinet door that pulls out to have two shelves. i'm not sure i'll like it, but it was either that or have a skinny 12" cabinet that is 24" deep, with shelves. i fear anything i'd put in there would get lost or be difficult to reach down there.

all in all i ordered:
-18" wide cabinet, its pull out trash/recycle drawer, and door
-12" wide cabinet, its pull out drawer, and door
-3 new end/cover panels that reach all the way to the floor (but will need cutting with dads table saw to fit)
-2 regular cabinet doors for the sink cabinet, plus hinges and door dampers, to replace the sink drawer i returned
-a replacement 24x40 door
-another kitchen island floor mounting piece for the extra peninsula cabinet since there will now be three cabinets instead of two
-handles for the new doors and drawers.

they said the Blankett handles are being discontinued. so hopefully i have enough. for the 12" cabinet, it turns out there are no 12" handles. so i bought a 15" one and will cut it down.

i picked up two of their trash cans, a couple more drawer organizer trays, and some drawer liner stuff for the 30" wide drawers in the cabinet next to the sink so things dont slide around. went and paid for it all and went and waited for the order to be ready and loaded it into my car.


got home and dad came up and we caulked between the new floor boards, and around the pipes, and around the wire for the dishwasher. oh we drilled a new hole in the floor for the dishwasher wiring.

we reinstalled the sink cabinet.
510

i did manage to get the screw loose for the dishwasher electrical box. this is the view from the bottom of the dishwasher that i had tipped onto its back.
.5-2019  (53)

took three days of wd-40. we got the dishwasher installed, but getting it level was a bit of a hassle. still not sure its entirely level. i'm supposed to add water and check that water level inside the tub to tell if its level, thats what the manual recommends.

i connected the water hoses
508
.5-2019  (55)

and dad connected the electrical. at the bottom of the little electric box is the hole for the little screw that gave us so much trouble.
.5-2019  (57)
509

then we put the sink back in, but had to do a bit of fidgeting and yank up on the pipes to make them fit the sink. got everything connected back up and flipped the breaker back on for the dishwasher. ran it and no leaks there. tightened up the faucet connections and no more leaks there. but the drain pipe under the sink was leaking. i had to throw a bucket under the drain pipe and wait until the dishwasher stopped running to fully disconnect and reconnect it. turns out the dishwasher was set for a 3 hours cycle. and i didnt know how to stop the cycle or any of that yet. easier to just wait it out.

tired. my feet hurt something awful.

Sunday, May 12, 2019

kitchen update # 46 - replacing the water damaged floor

yesterday dad came up and we worked on the damaged floor.
first we cut off the old leaky shut-off valve to the dishwasher.
496

the new press-to-fit shut-off valve, alongside the orange "safe seal depth and pipe deburring tool". it fits 6 different sizes of pipes. and those metal rings in the middle are the sharp pipe deburring piece. you fit the tool as far down on the pipe as it will go, spin it around a couple times to deburr, and mark a line on the pipe.
497

then you press the valve onto the pipe until it reaches that line. it was extremely handy to have that line as a guide because it took a lot of pushing and effort to get the valve properly seated as deep as it was meant to be. twice we thought we had it, but nope. keep pushing and then finally it was fully in place. dad is pretty sure this one wont leak.
499

and onto the floor

we removed some of the laminate flooring and pulled back the foam underlayment so it wouldnt be in the way or get damaged when dad used his skilsaw/circular saw to cut the subfloor exactly two feet out from the wall to fit the replacement plywood. we've taken out the first piece of subfloor, having to cut around the pipes, and have one more piece to go.
500

second piece of damaged subfloor removed. the yellow you see along the bottom is the old linoleum that would not come unglued for anything we tried. thus why i have laminate flooring. the white along the very bottom is the foam underlayment. the diagonal boards are the original subfloor layer. the plywood was added on top of that but only in the kitchen and dining room. the rest of the house has hardwood floors nailed directly to the diagonal subfloor.
501

the view from my basement, looking up at the floor joists and diagonal subfloor of the main floor. all those nails are from the solid oak hardwood floor (circa 1965).
.2-2019 (4)

first piece of replacement plywood in place, up against the first pipe
502

second piece in between the two pipes
503

third piece in and nailed down
504


today the house stinks. yesterday evening and today i put three coats of varnish on the new bits of subfloor.
505


the windows have been open, so heidi has enjoyed watching out the front window and smelling the outdoors too.

i also painted another coat of white on the walls under the upper cupboards.


i've loaded everything to return to ikea into the car. the assembled drawer unit for under the kitchen sink, the 30" wide peninsula cabinet i'm going to replace with the recycle cabinet, the unassembled drawers and drawer fronts for that, the handles for that and the handle for the sink drawer, the dented 24" upper cabinet door, and the end/cover panels for the peninsula that dont come down to the floor.


next up, dad comes back to hook up the dishwasher, put the cabinets back, and put the sink back together. right now its sitting out in the porch.
506

the paper towel sticking up out of the pipe is because that shut-off valve is leaking. we need to replace both of those. dad is reluctant, not being fully sold on the press-to-fit. but i'm holding out. he hates soldering copper pipe. so i'm going to win. i just need patience.
507


theres trouble with the new dishwasher. we cant get the screw loose to remove the cover for the little electrical box to wire it in. and if we cant open it, we cant wire it up. its one tiny little screw, and neither dad nor i can get it loose. i've spent two days spraying wd-40 on it trying to loose it up, but nothing. what the hell did they screw it in with? and impact wrench? jeez.

dad said we can put the dishwasher in his truck and take it back. problem is, its not in stock, its special order. the only appliances the stores carry in stock anymore are stainless steel crap. i want white appliances to match my kitchen. i'll never understand why anyone would want stainless steel. ah well, theres no accounting for taste.

Friday, May 10, 2019

kitchen update # 45 - kitchen floor, replacement valves, and no on the undersink drawer

i went to menards and home depot to check for treated plywood in pre-cut sizes for the kitchen subfloor.

the options at menards were some seriously slim pickings, despite having many different size offerings. what was there had split layers, cracked thru, and warped. it was pitiful, and theres no way ANYONE would buy product in that poor of shape. i should have taken pictures.

home depot had only one size cut plywood panel, but they had tons of that size to choose from, all looking great. so now i know where to buy them.


i picked up 3 push-to-connect, quarter-turn, shut-off valves. one to replace the leaking dishwasher shut-off valve. the old one is not a quarter turn one like the two faucet ones are, its more like an outdoor faucet valve where you turn and turn and turn. the towel i have under that valve is getting wetter and wetter. i have to move it and change it out more and more frequently. its failing, and it seems to be getting worse.

tomorrow dad is coming up and we're going to work on replacing the water-damaged subfloor under the dishwasher and sink. and replace the leaky dishwasher shut off valve.


its looking like the drawer under the kitchen sink wont work without heavily cutting the metal backplate of the drawer. and i dont want to do that, i fear it would compromise the sturdiness of the extra wide 36" drawer. but i so DEARLY want the trash and recycle bins in a drawer, out of reach of the dogs!

so i'm looking at returning the 30" wide peninsula cabinet for two 15" wide cabinets. one cabinet with regular drawers, the second one with a trash/recycle drawer. but finding trash cans that would fit the 15" cabinet it is turning out to be a challenge. the inside of the cabinet is only 13.5". most trash cans i'm finding are 14 or 15 inches wide, or even wider. and trying to search for that size trash can pulls up how many quarts or gallons it is instead of how wide it is. so i'm not sure a 15" wide cabinet will work. the 18" cabinet would be ideal, but there is no 12" wide cabinet with drawers. so i'd be shortening the peninsula. i could do a 24" cabinet, but what would i do with THAT much trash can space? and i really wanted the 30" cabinet there. *sigh*. best laid plans gone awry.

i dont know what to do yet. i need to think more and maybe spend some more time on ikeas website. i dont want a 12" wide cabinet thats 24" deep on an inside corner. it'd be a major pain in the ass to reach anything in such a narrow deep cabinet.

but i know for sure the 30" peninsula cabinet is going back. and it wont fit in my car. and i dont want to make dad drive his truck up here, load the cabinet, and drive down to ikea to return it. so i took the cabinet apart and pounded the nailed-in backing piece loose. i tested the fit and i can get it back together, so if i load it all in my car disassembled and bring a couple tools, i can assemble it in the parking lot and return it looking whole rather than looking pounded apart.
a close up of the hole left behind by the nails in the backing piece
493

from a distance its not so bad looking
492
the back piece still attached to the base of the cabinet, the sides already pounded loose.
495


also, the laminate flooring has ended up being an inch short of reaching where the toe-kick will mount, along the whole length in front of the sink side cabinets. i have no replacement laminate flooring pieces that can 'lock' in place. only one long board is left. we can maybe cut it in strips to fit, but we cant attach them to the rest of the laminate flooring. we'd have to maybe glue them to the floor or something.

a picture of the toe kick set in place, showing the gap between the laminate and the toe kick
481

an inch short
478

a not inconspicuous gap
477

lots to think about.