
we took advantage of it right away

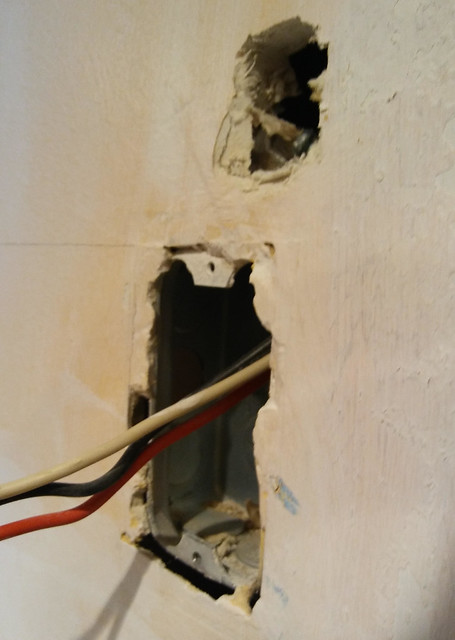
we tried to move the outlet behind the stove but discovered that particular wire is inside metal conduit on an inner wall! where metal conduit is unnecessary. *sigh*. to access that piece of conduit and move it would be a big mess and pain in the ass and involve cutting away and replacing a LOT more sheetrock. so we'll leave that box there. then we cut a hole against the stud to the left.

the hole where we discovered conduit, above the old electrical box was our attempt to discover if the wire came in from above or below.
the duck tape on the countertop is from where dad glued the pieces together earlier in the week. after we were finished today we removed it. its held up quite well.

old wires above, with the wire nuts capping them, new wires down below, going from this box over to the left to the new box.

(the ground wire is already screwed to the back of the metal box).
it took a while for dad to strip all the outer coating from the group of wires.
the wire 'cable' contains three wires. black, white, and ground. thanks to alternating current, black is hot, white is not/return, ground is obviously ground. there is the thick outer insulation coating enclosing all three wires. a thin layer of brown paper insulation, and the three inner wires. black and white are enclosed in black and white insulation, and the ground is in another layer of brown paper insulation. all that insulation has to be stripped back to expose the bare wires for contact with the outlet, and the live wires in the old outlet.

in our case there's a fourth wire, a red one. because all my kitchen outlets are split-wired to two circuit breakers.
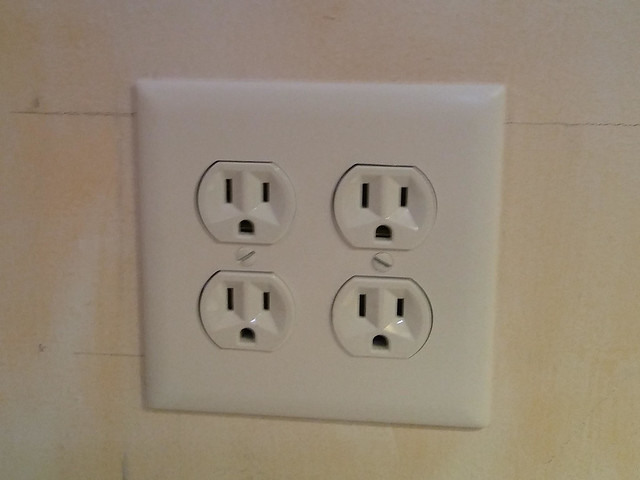
we mounted the new box, wired it to the old box with a new strip of wire. we also changed it from two outlets to four, since the microwave and toaster oven are going to be sitting on a shelf above this outlet, and i'd still like to be able to plug additional things in.

but now its all wired up and I have outlets on that side of the kitchen again. yay! its all pretty with its new cover plate on
we slapped a flat cover over the old box. and i'll patch the hole.

almost all pretty

see why we had to move the outlet? the old one is behind the stove because we moved the stove over 3" to allow me to widen the counter between the fridge and the stove from 15" to 18".

(hole patched)
see my pretty first half of the kitchen now with temporary shelf/countertops

next up, I need to decide how wide I want dad to cut the shelf I bought for the microwave and toaster oven. and I need to measure the piece of paneling for over the stove to fill in that gap above that cabinet.
I also need to figure out how i'm mounting that shelf, because the stud on one end is farther out that the upper or lower cabinets and the shelf would stick out funny. there are two studs for the shelf to be mounted to, which should hold it. I think. but I bought three brackets just in case. I could use wall anchors for the one end that'll have the heavier microwave on it. dad doesn't think much of wall anchors. I do. but I don't know. I worry about the weight of the microwave. I'll figure it out, I need to think more.
No comments:
Post a Comment