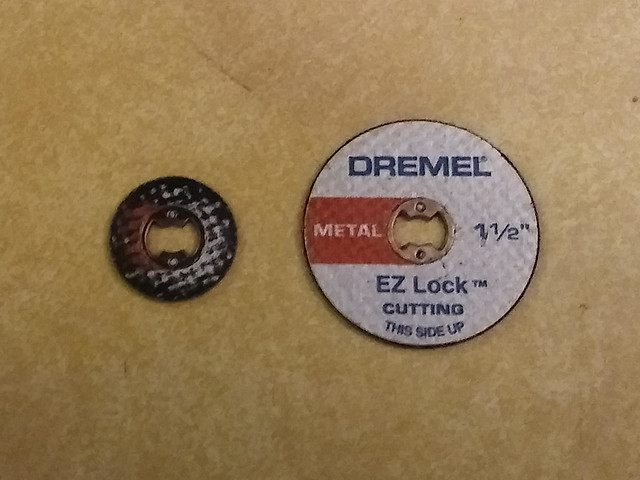
dremel cutting wheel mid-use

the used up cutting wheel on the left, a new one on the right. I got about 3 cuts thru the suspension railing before it was used up too much to continue. I think the 5-pack I bought will be plenty.
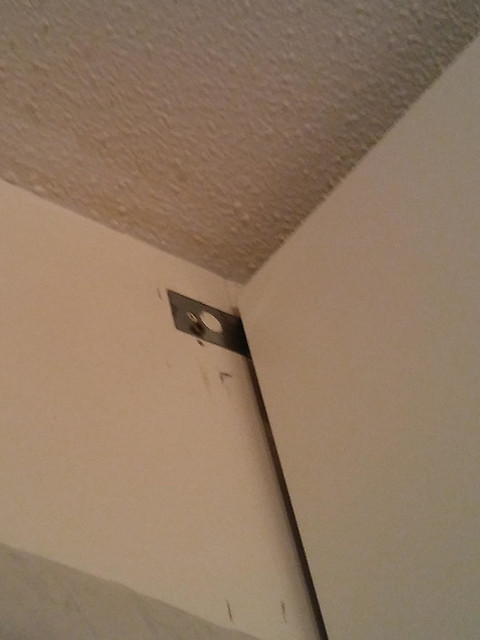
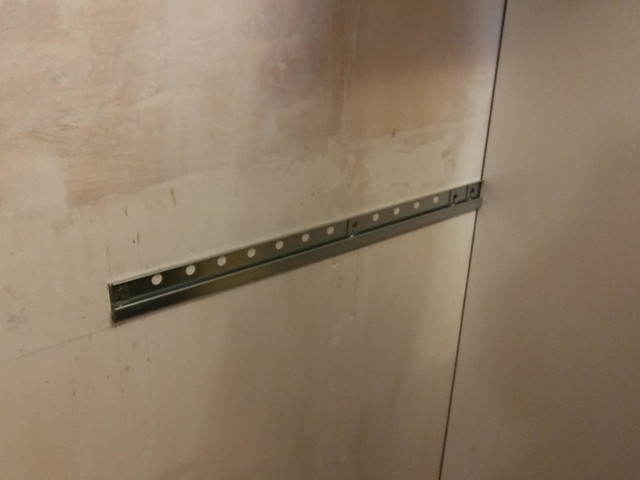
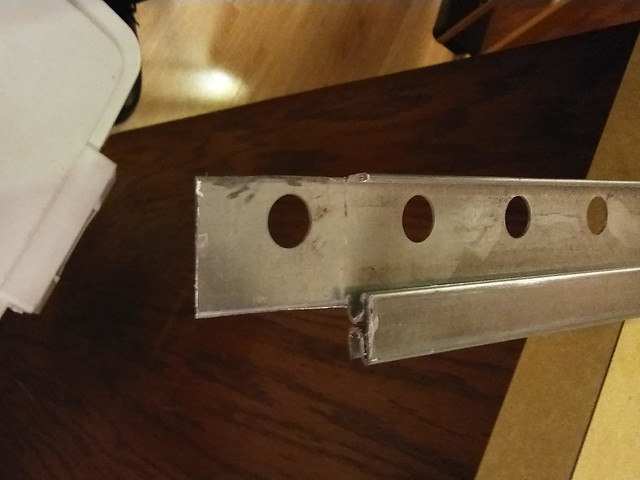
after switching to a new cutting wheel, we made some special cuts on the end of the second section of upper railing because it needs to hit a stud, but the stud was only an inch past the end of the cupboard. the end panel will conceal most of it, and I can place a decorative piece of wood over the remaining metal. we cut off the top curving-over sticking-out part, and the bottom bump out that the rails hang from. so theres just a flat strip of metal over that last stud, sticking beyond the end of the cabinets.

we had to drill two new holes thru the suspension rail down LOWER than the holes provided. dad thinks it has to do with the doorway to the left and extra support for the load bearing wall over that doorway. and drilling an extra hole thru the metal of the suspension rail for those last two studs.
we ran into some trouble with the two of the studs. up near the ceiling, the last two studs (and only those last two left upper studs) we hit metal. the drill bit would NOT go farther in. so we had to try different locations above or below in the stud before we could get thru in just wood. dad thinks it has to do with extra support for the load bearing wall, and studs meeting the top plate/board. whatever it was, it was a surprise and inconvenient. but we got it eventually. just took a lot of fiddling.
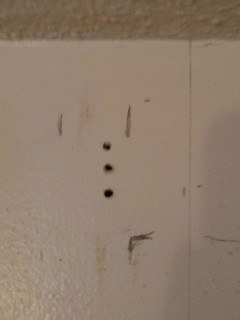
which meant we had to drill a hole higher up thru the rail to accommodate the alternate screw location

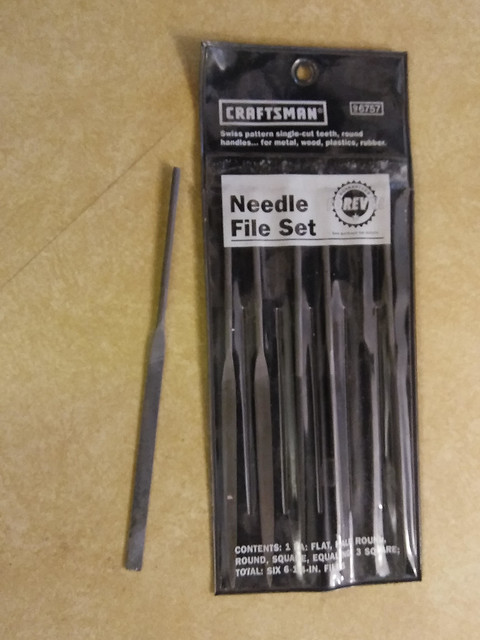
having a small file set helped remove the metal burrs from drilling thru the metal
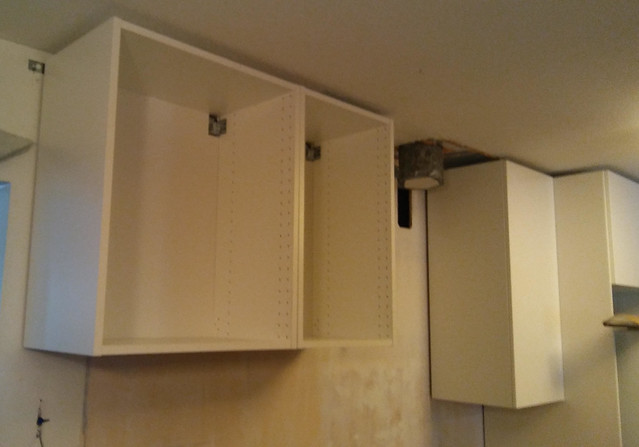
the sticking out metal rail piece, but the upper cabinets are not yet in their final place.
because it turns out that the 20" cabinet above the stove is too high, and the 30" cabinet is too low. there is supposed to be 24-27" between the vent and the stove according to all the different exhaust vent companies. the exhaust vent I want is 9" tall, mounted to the bottom of that cabinet. using the 20 inch cabinet mounted on the rail as it is hung in alignment with the other upper cabinets, it'd be 32" above the stove. using a 30" cabinet it'd be about 21" from the stove. mom and dads upper cabinet is 30" and only 22" above their stove. mom says its too close and that another couple inches would make all the difference, which jives with the manufacturers' recommended distance of 24-27". (we do canning/preserving and need room to lift out quart size jars from a loaded canner).
but to lower it, we would need to make a filler piece to put up above it or the vent pipe would be exposed. plus it'd look funny, out of line with the others along the ceiling, and the trim piece up there wouldnt fit.
the filler piece could come from the cut-off pieces from the panel on the side of the fridge. we had previously cut off two long strips to make it fit from 36" down to 24'. one is 5 7/8" wide, one is 5 15/16" wide. but there may be some chipping out of the white veneer from dads skilsaw. so it might need to be trimmed narrower. it could be cut from the 96" length down to 30" easily (and taped to try to prevent chipping). 6" seems to be about the tallest we'd want to gap down that cabinet, so there is lots of room to adjust and cut.
dad wants to wait til we have the vent hood and try to line things up with the other 30" tall cabinets... but the bottom of them is 29" above the stove, which is above the 24-27 inch recommendation. so we have wiggle room. but I'd be just fine with the exhaust vent sticking down below those adjacent upper cabinets.
the alternative is to buy the prohibitively expensive fancy vent hoods that go all the way up the wall to the ceiling, down to the exact right height over the stove. and i'm NOT buying ikea appliances. I've read too many bad reviews saying they're not great quality and fail.
so we haven't done that cabinet yet. we need the actual vent hood to figure out more. and the height the suspension rail for that cabinet will be mounted on will be determined buy how low we want the cabinet and vent to go. less than 6", but HOW much less? we dont know yet. i think we can kind of pick anywhere from like 2-5". i think.
what we've got so far
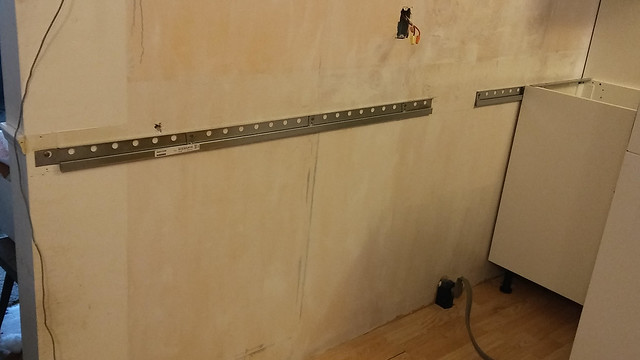
next we installed the base cabinet between the stove and fridge. only one stud was there, so we extended the rail behind the stove the the next stud. the stove hides it so I dont care. we used drywall screws just to shore up the right most end of the suspension rail that the base cabinet hangs from. its securely attached to the other two studs, but that right end could maybe move a little. so we put two screws with washers in those last two holes.
then we had to fiddle with the fridge panel, shimming it out at the base to make it line up with the front of the base cabinet vertically. the panel lined up at the top of the base cabinet, but down lower the panel didn't stick out enough. so we shimmed the bottom forward. and screwed that base cabinet into the panel.
oh but I skipped the big fiasco about how FAR up from the floor to hang that suspension rail for the lower cabinets. the distance they gave on the instructions, turns out that's the very bare minimum, and supposedly if you go lower, the legs WONT adjust lower. I saw multiple websites that mentioned that as a problem. so we got the legs out before we mounted that rail and messed with them a little on that between the stove and fridge cabinet and determined that yes, we needed to go a wee bit higher. it says 32 3/16". we went 32 1/2". this way we had play in the legs to get the leveling right. needless to say there were three different height marks and lines on the wall before we got this sorted out. all because ikea cant be bothered to include any WORDS like *minimum* in their instructions.
so we got the rail mounted for the cabinet between the stove and fridge. got it leveled and the fridge panel shimmed and the two of them screwed together. then we got the other rail end cut special on the left same as the above rail so just the flat piece sticks out beyond the end of the cabinet.
screwed it in.
attached the two lower cabinets. adjusted the legs on them and leveled them out. clamped and screwed them together. we screwed the sides of the cabinets together at the back at first, but that was wrong because the front didn't line up and we had to unscrew the back and adjust and clamp the front two cabinets into alignment again and screw together, then screw the back screws in. I didnt get a picture of this.
then we loaded that stupid gigantic plastic 4'x8' ikea pallet the delivery company dumped on me into dads truck, along with the two ikea boxes that belonged to someone else that they delivered to me.
by the end of the afternoon, I had reached my limit of being able to get up off the floor. I had no get-ups left in me. pooped, exhausted, and wiped out.
dad also helped me with this weird metal connector part for the back of the stove where the cord came out. it fell off with all the moving back and forth and plugging and unplugging that the stove did, and required some precision bending to finagle it back in place.
No comments:
Post a Comment